How to Add NCPurchase ROAS in Ads Manager
1. Verify Custom Events: NCPurchase and RCPurchase
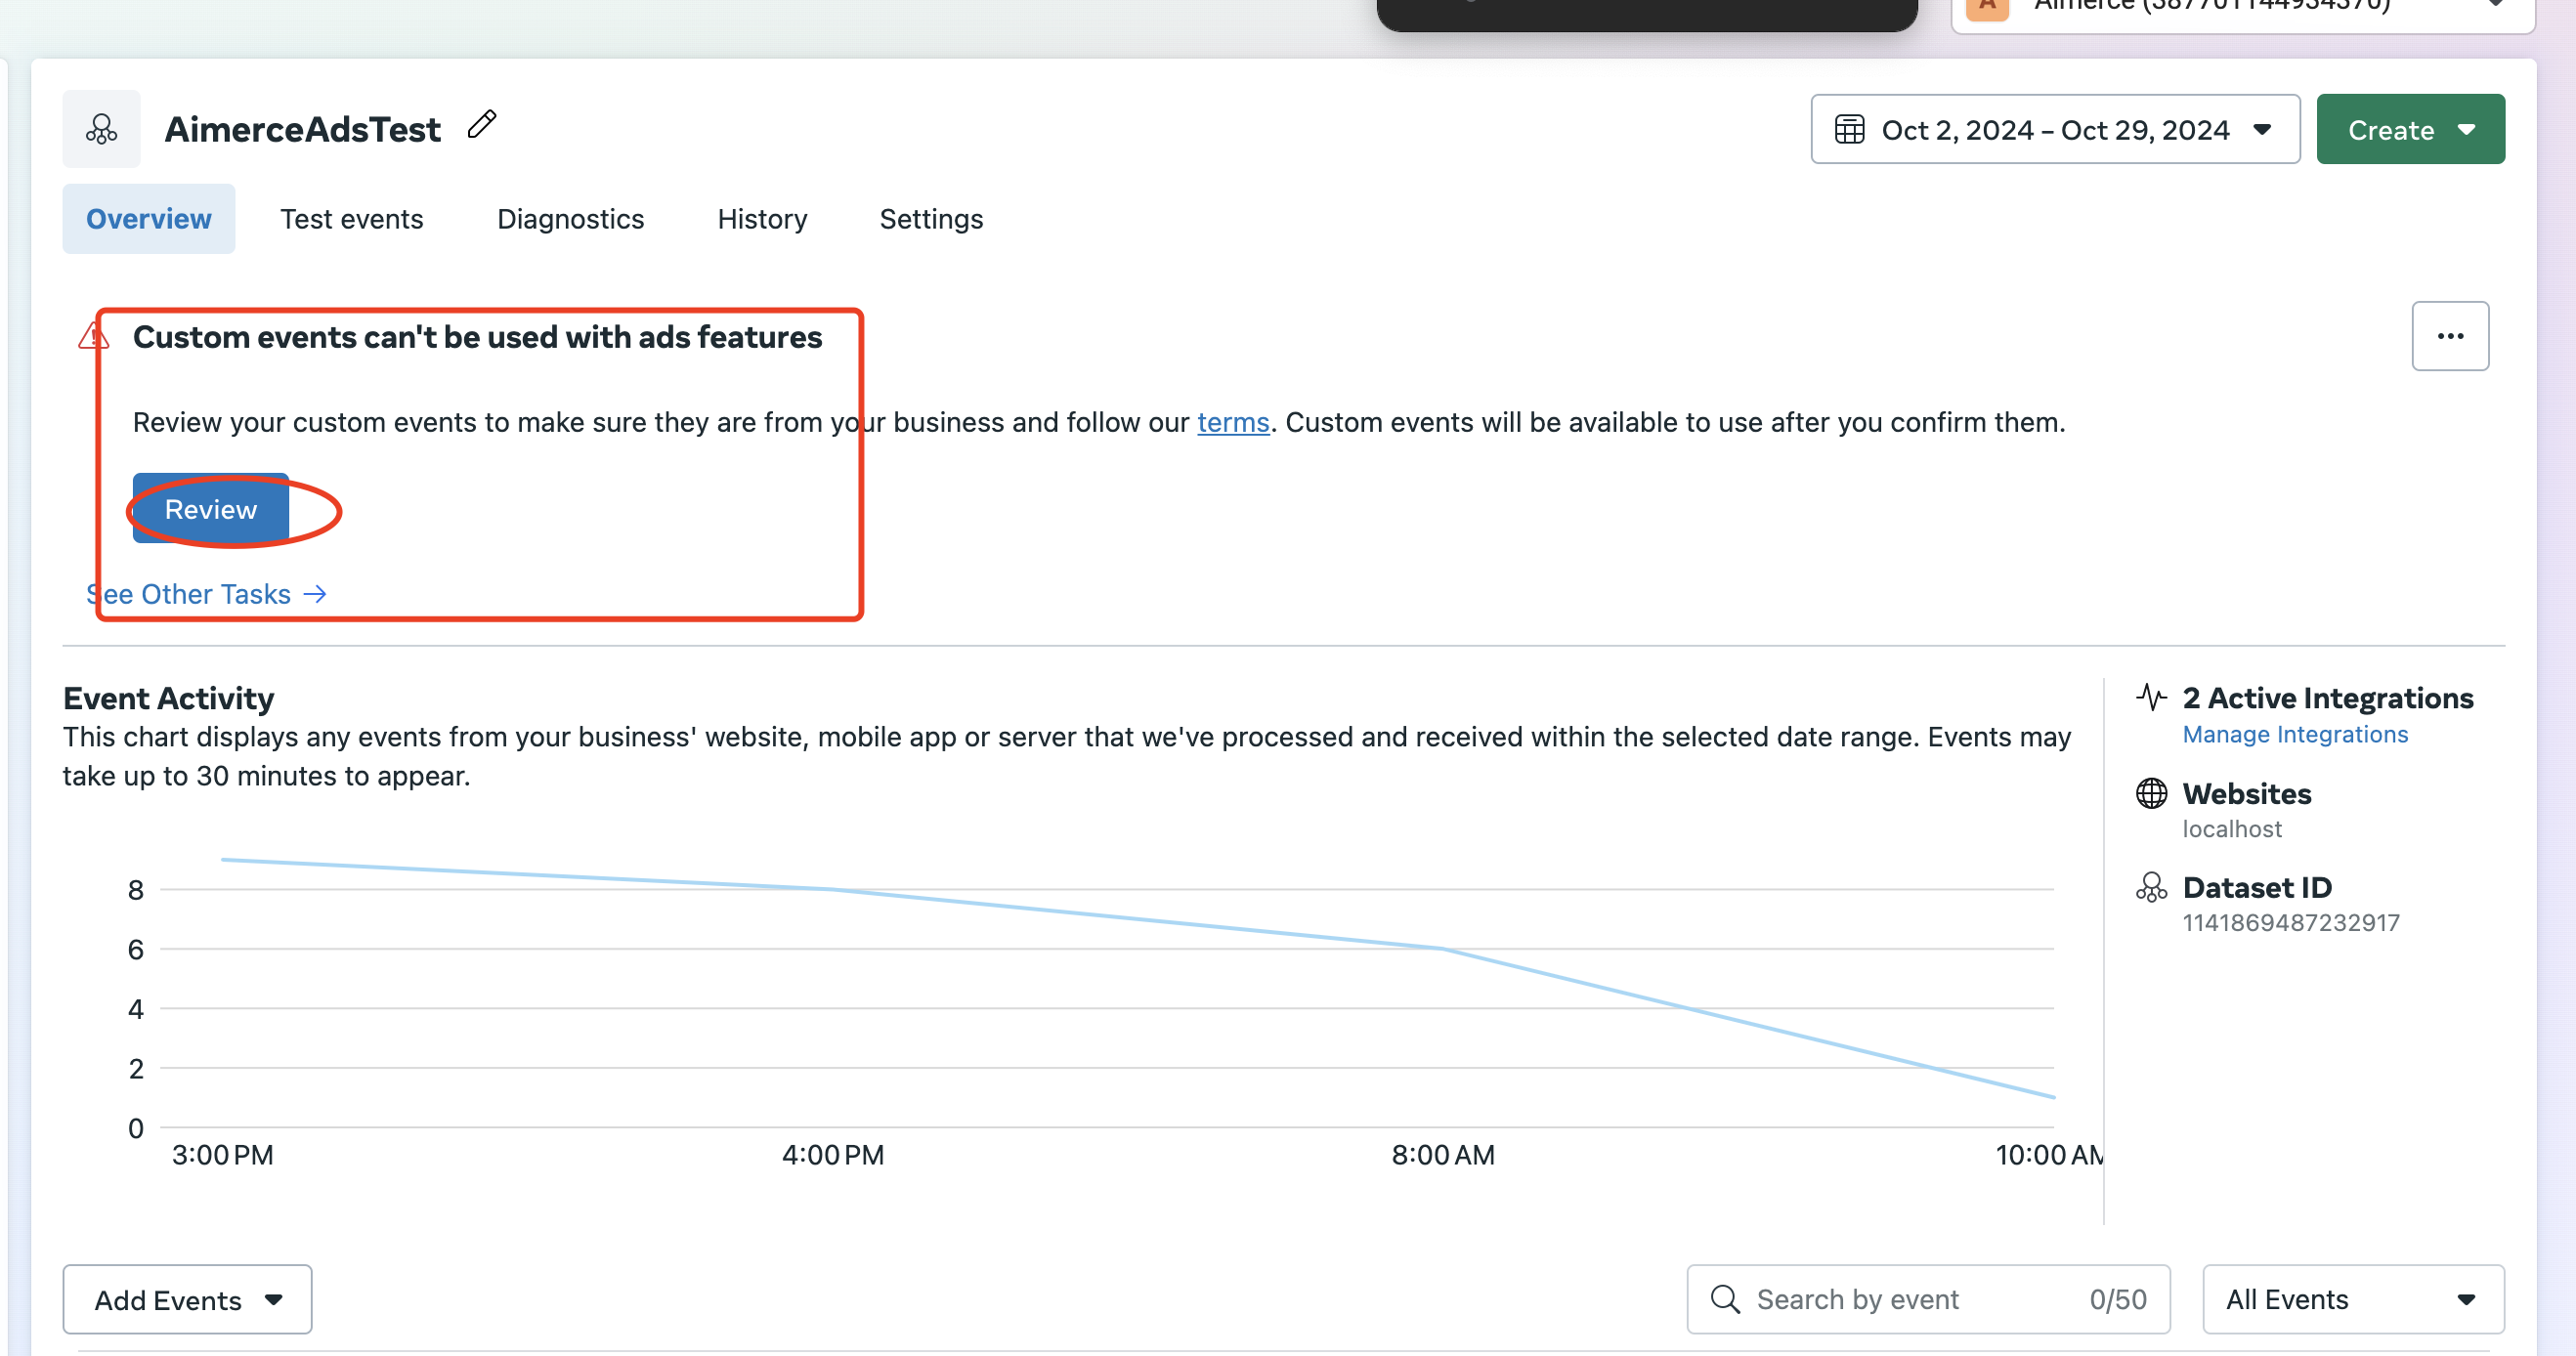
In the "Overview" tab of your pixel (Dataset), you will see alerts for any unconfirmed events. Click the "Review" button.
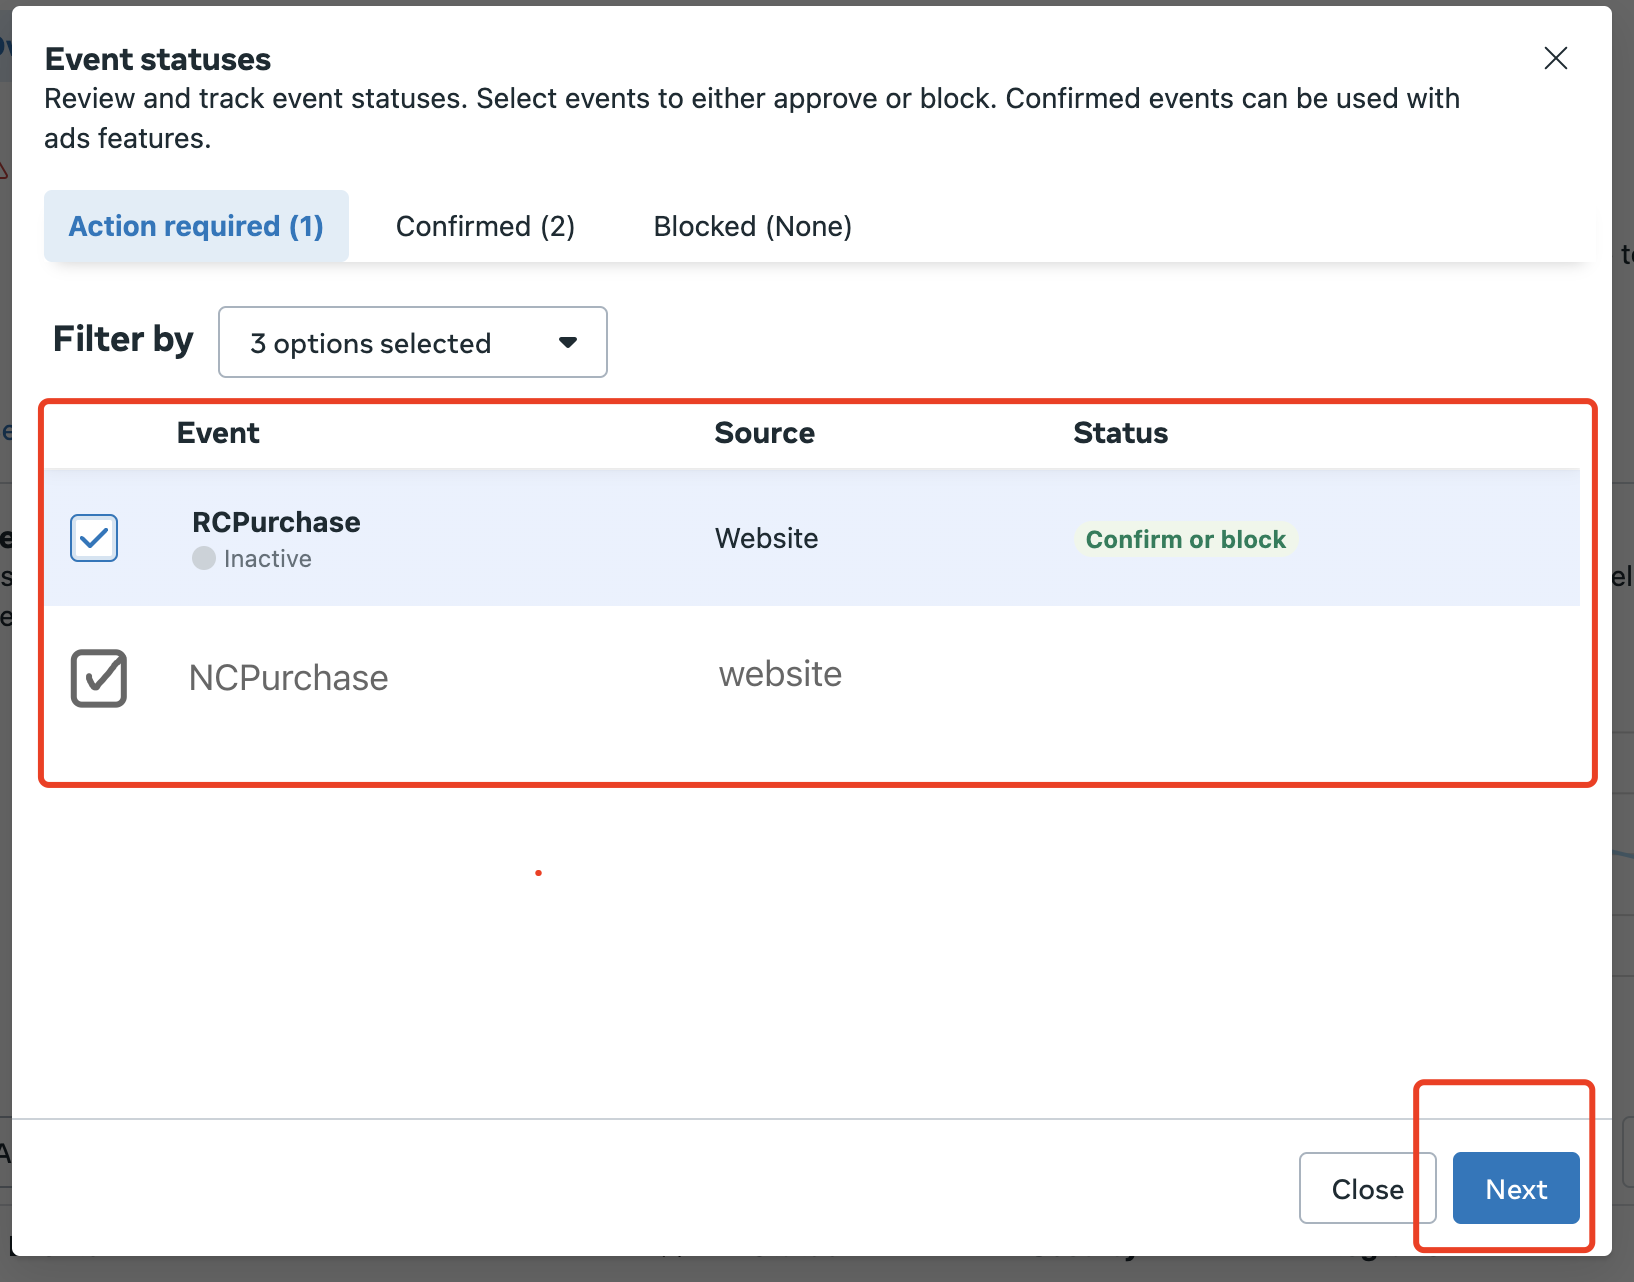
Please select both "NCPurchase" and "RCPurchase" within this dialogue box, and then proceed by clicking the “Next” button located at the bottom right-hand corner.
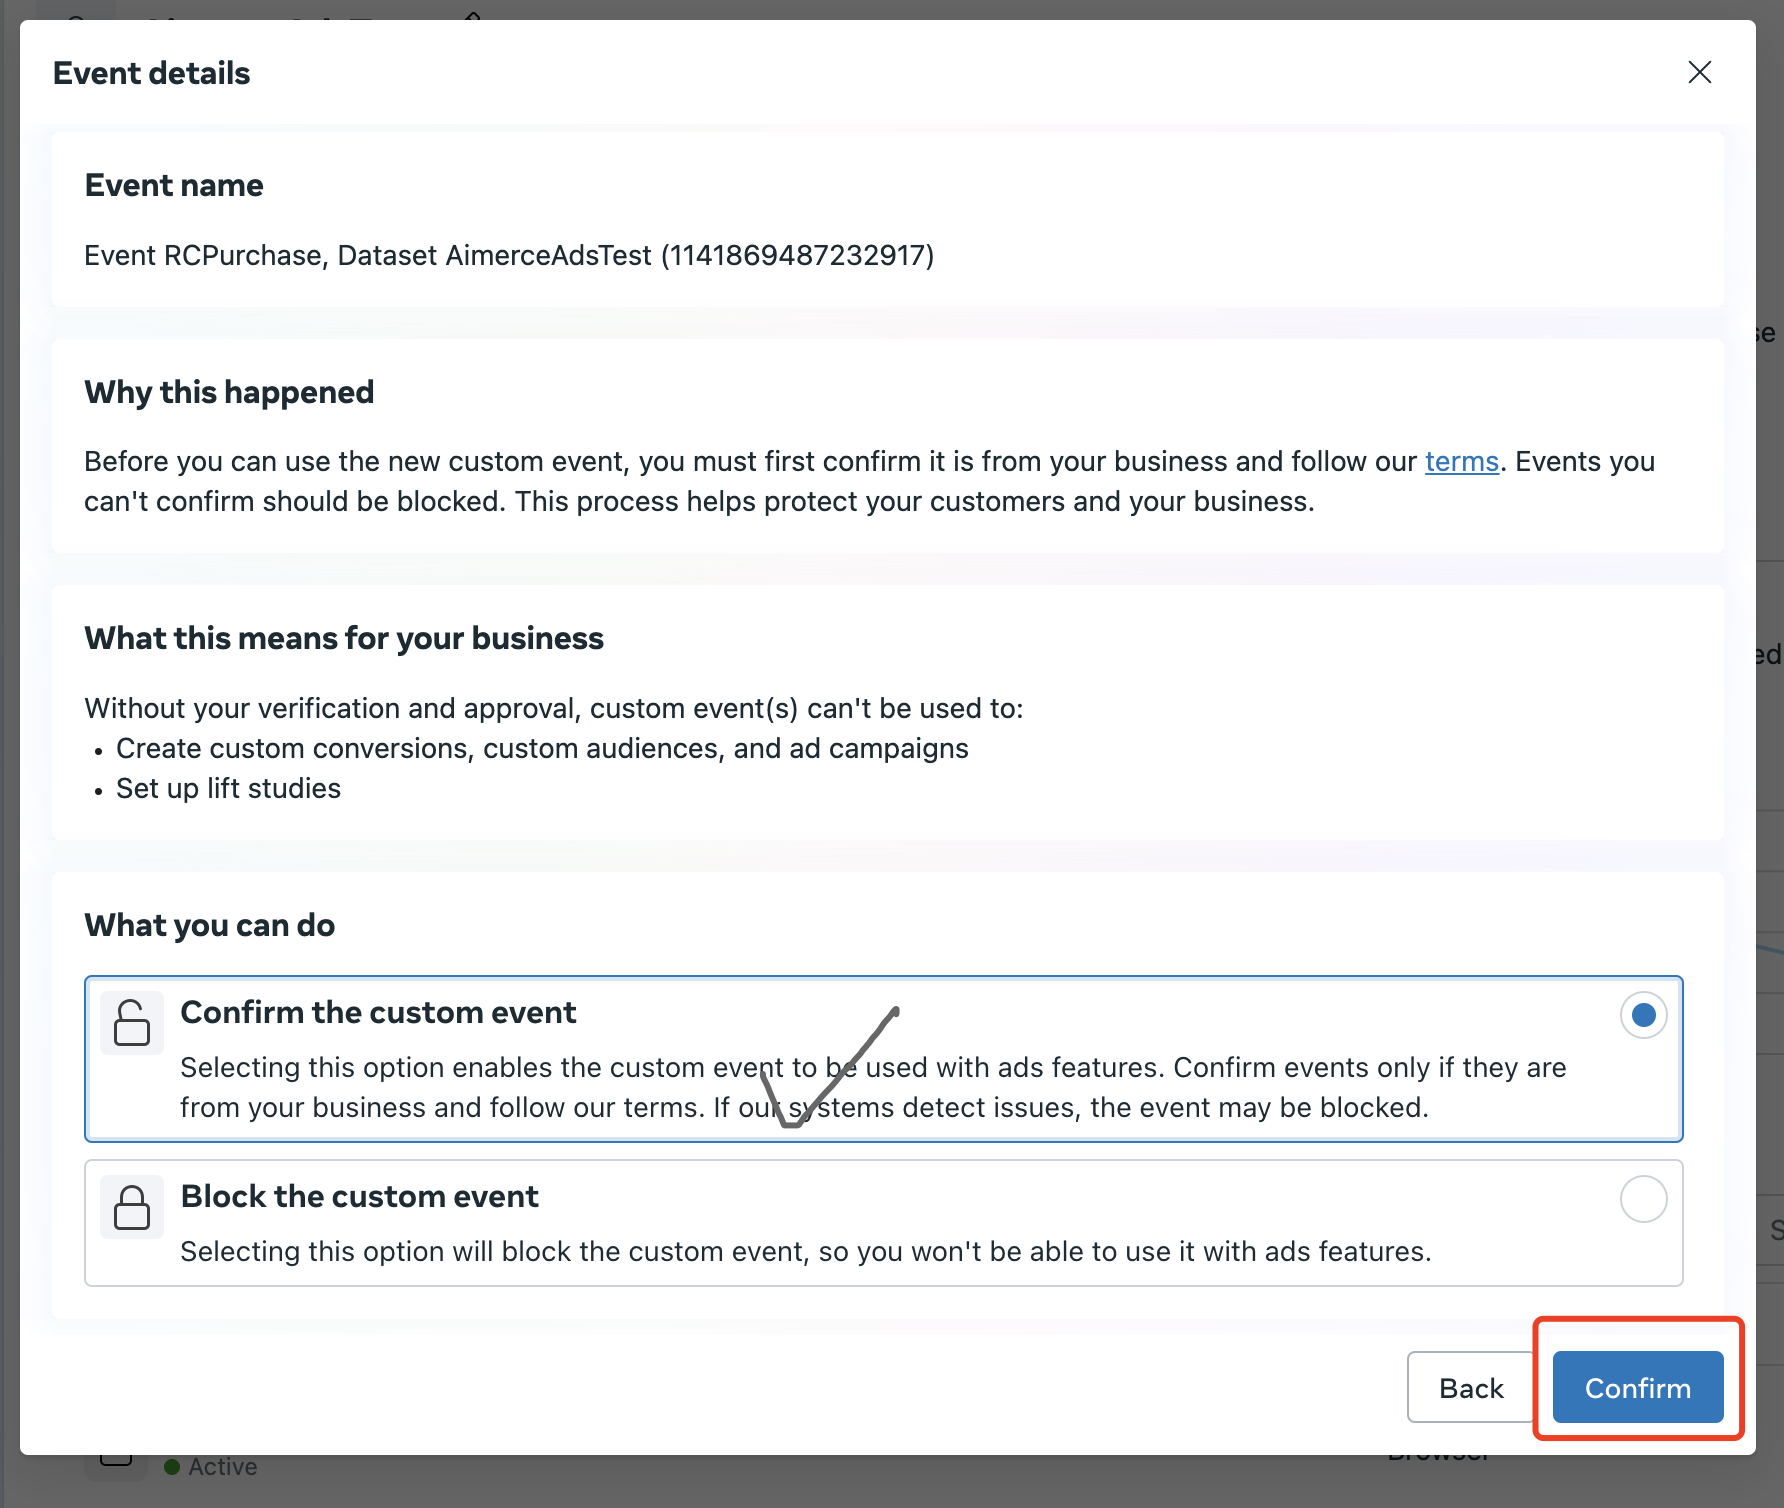
Select the option "Confirm the custom event" and then click the "Confirm" button; this will finalize the confirmation of the previously selected events.
2. Create Custom Conversion & Share with Ads Account
Access the management page for "Custom Conversations" through the menu located on the left side.
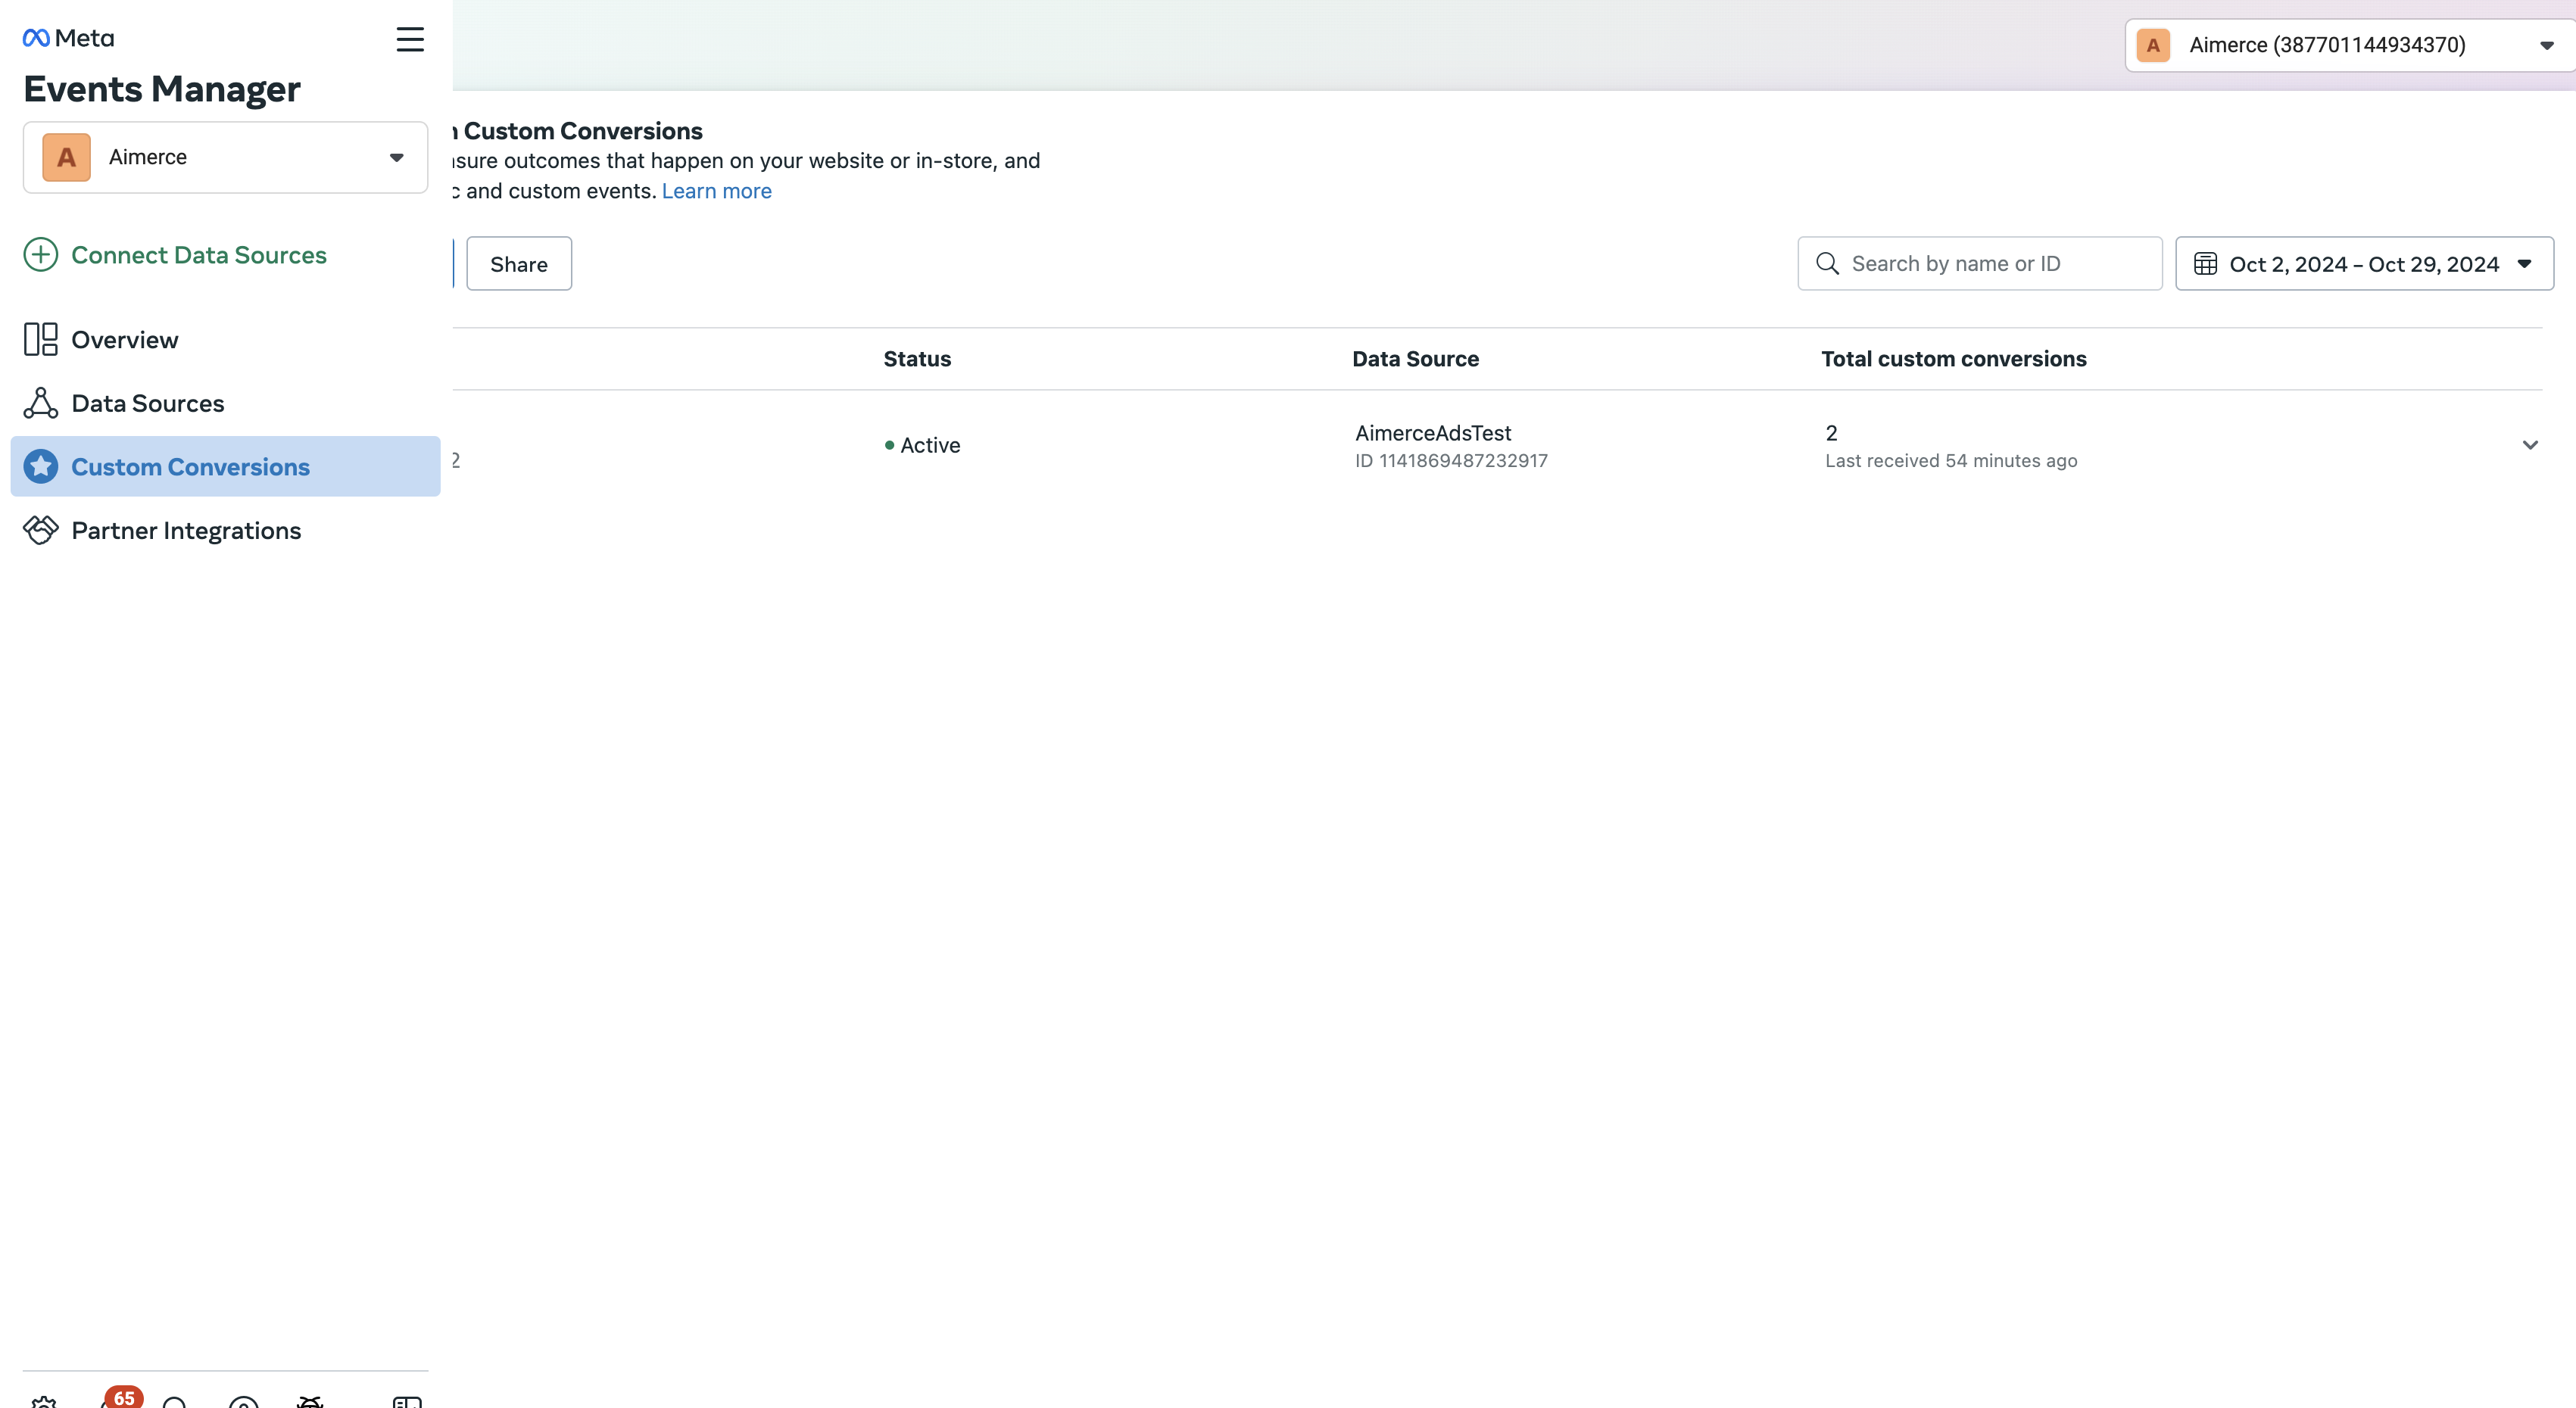
Let’s create a custom conversion by click button “Create custom conversion”
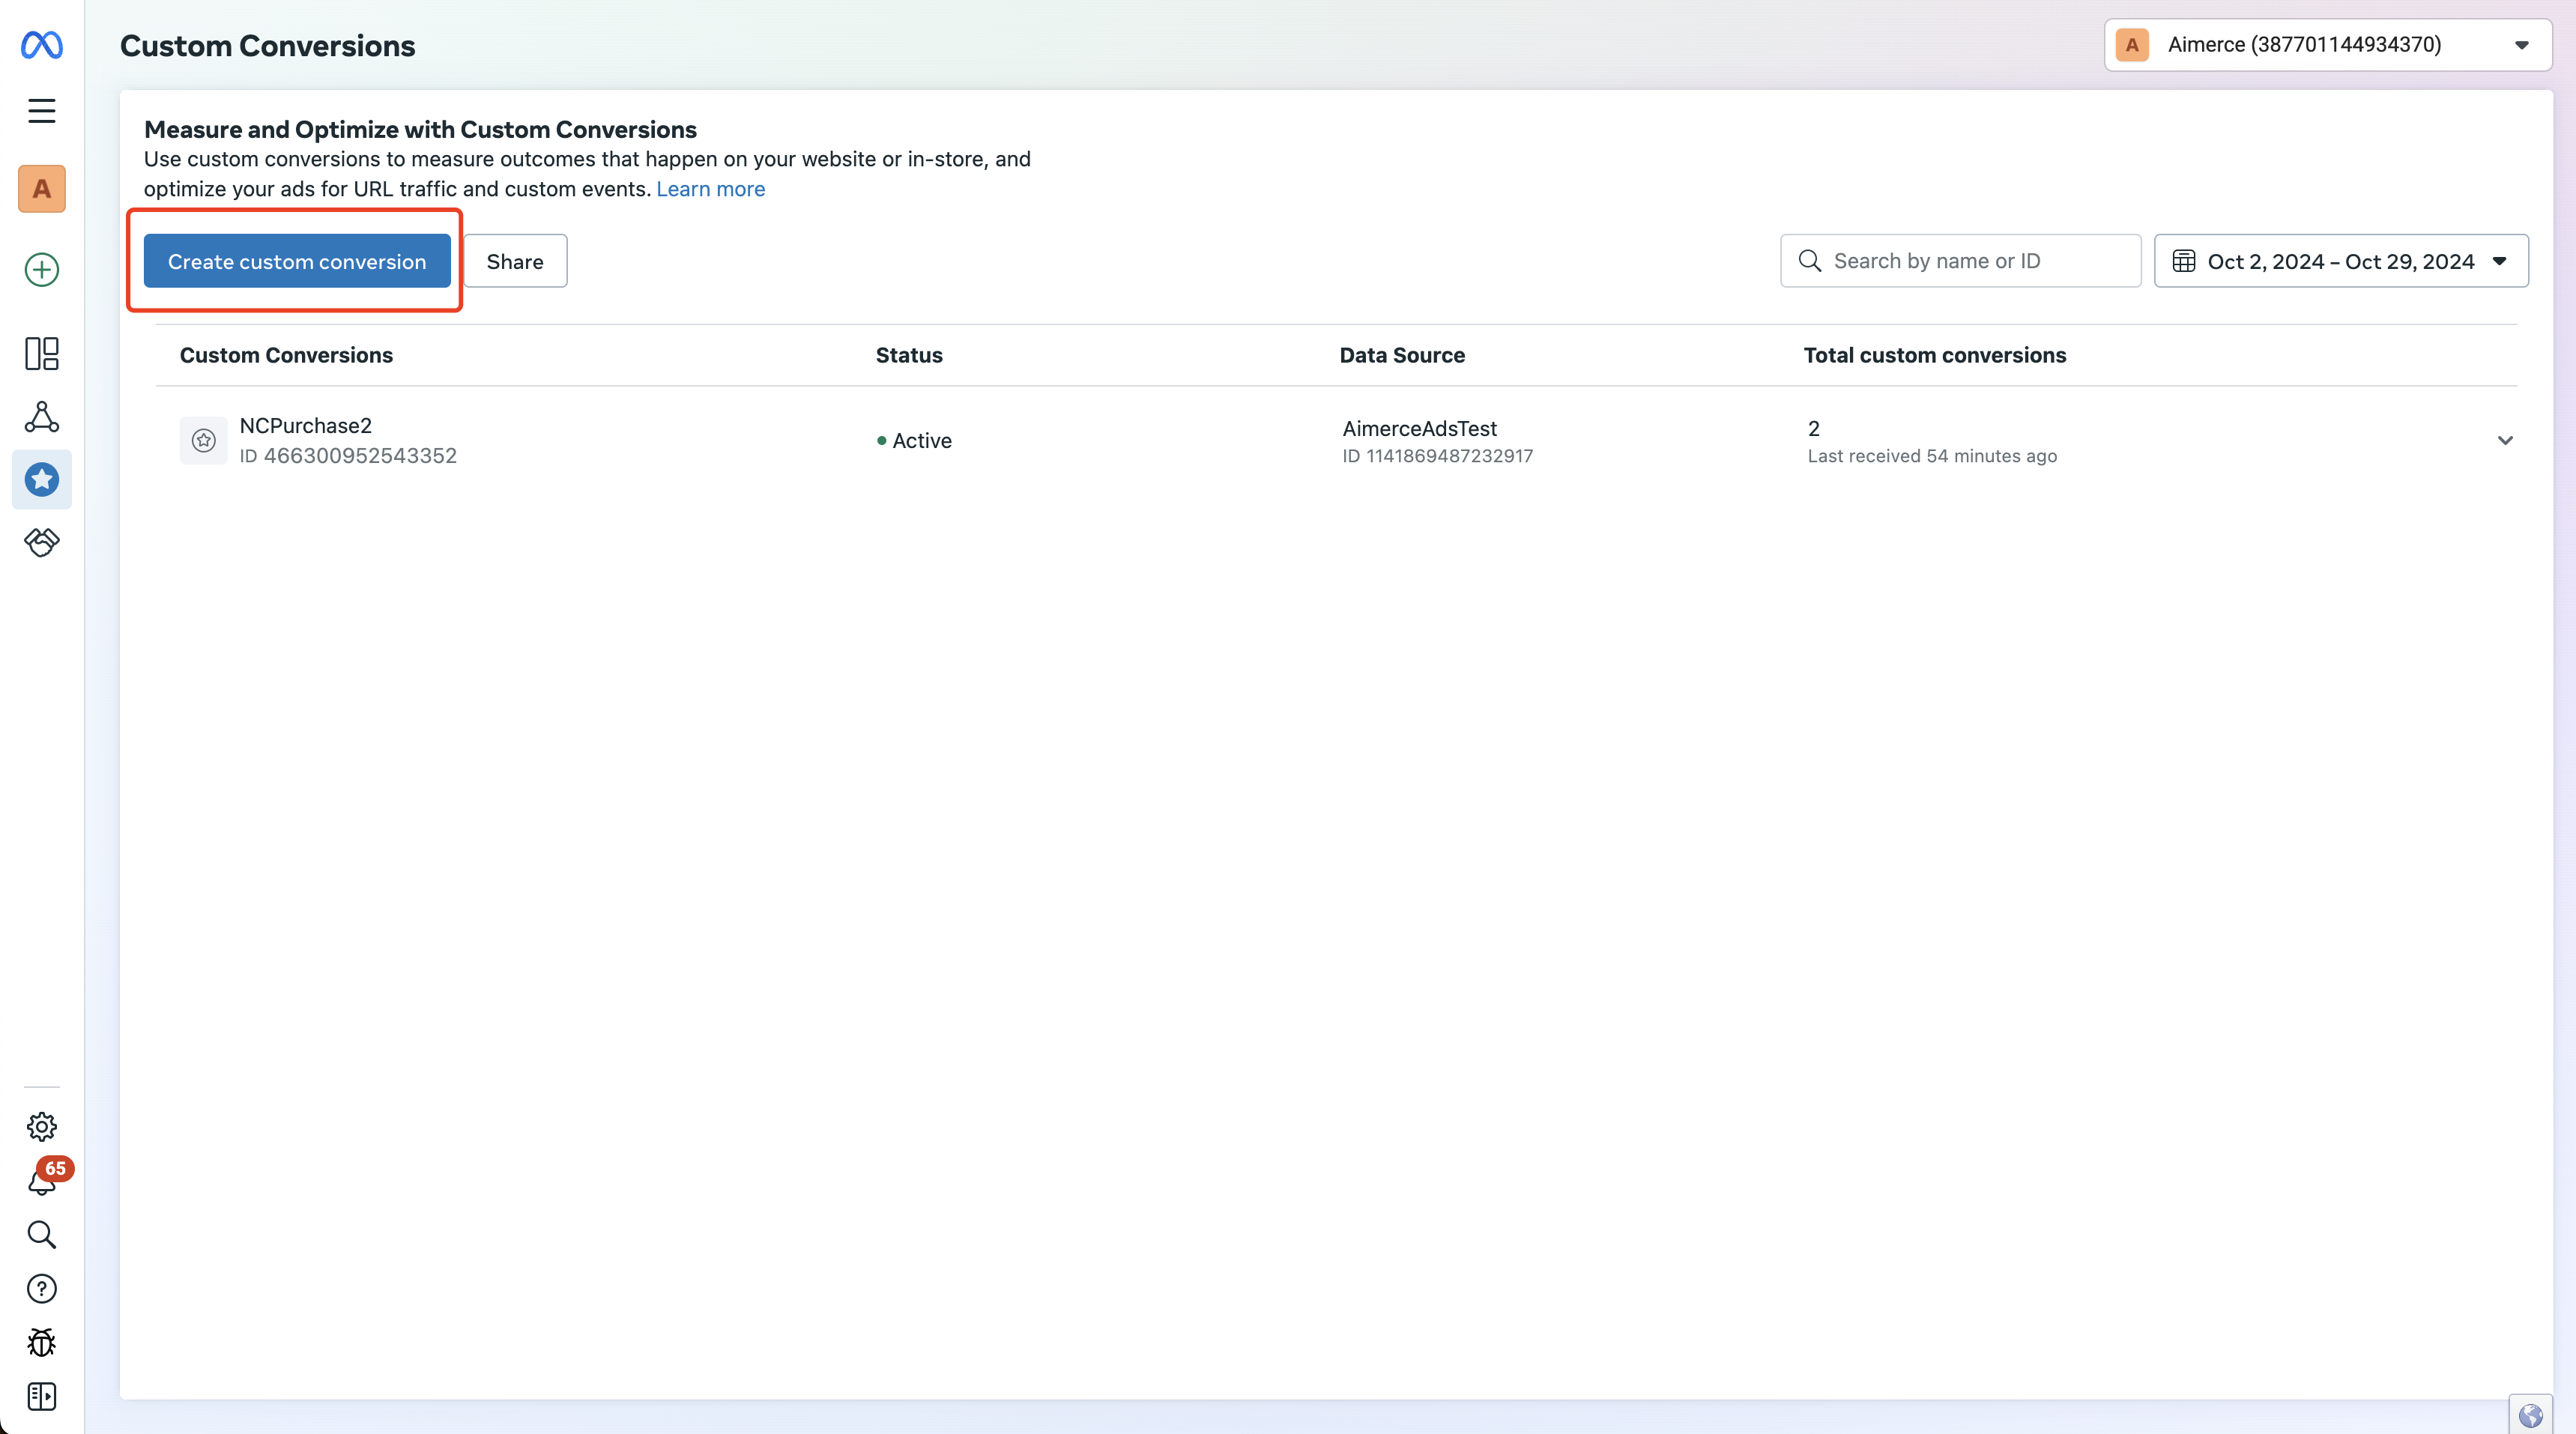
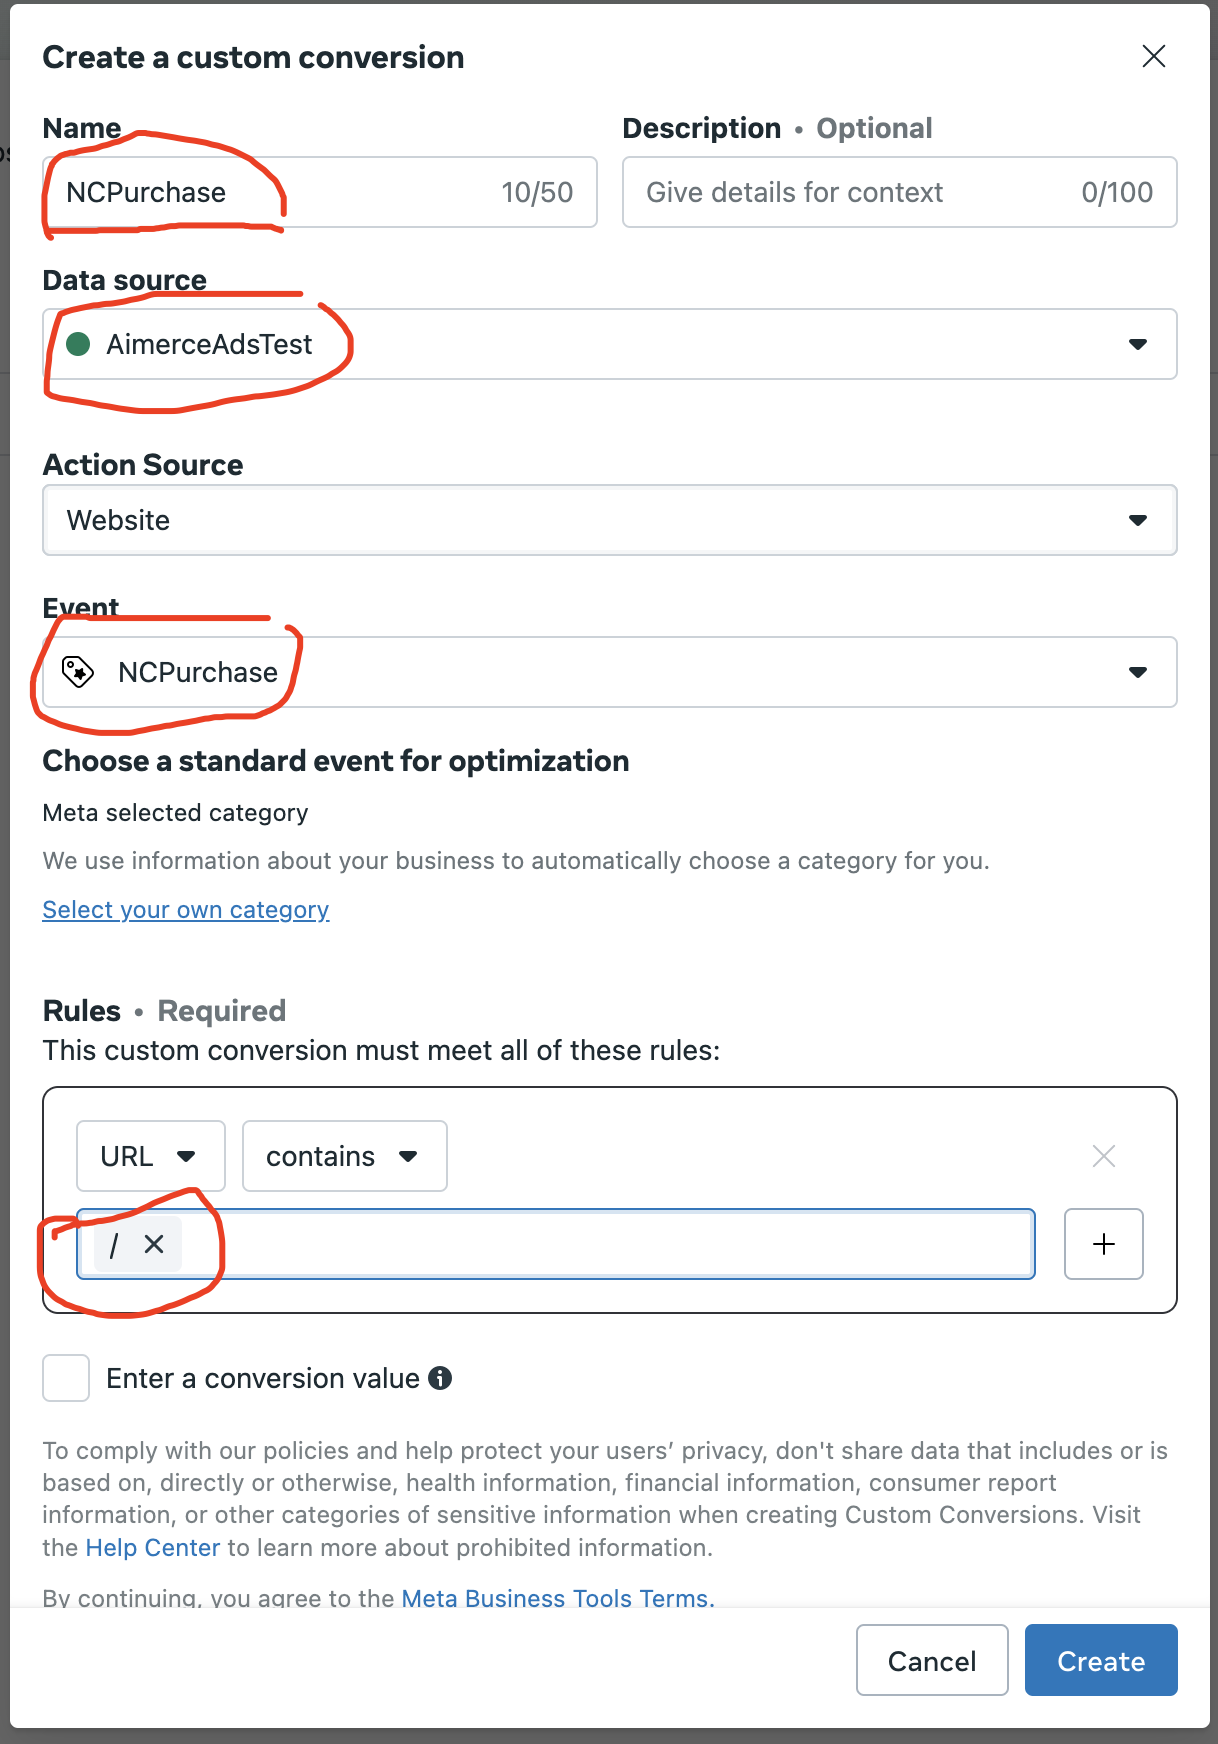
In this dialog, please undertake the following four actions:
- Enter "NCPurchase" in the name field.
- Choose the pixel (Dataset).
- Select the event labeled "NCPurchase."
- In the Rules section, simply set "URL" to "Contains" and input "/".
Finally, click the "Create" button.
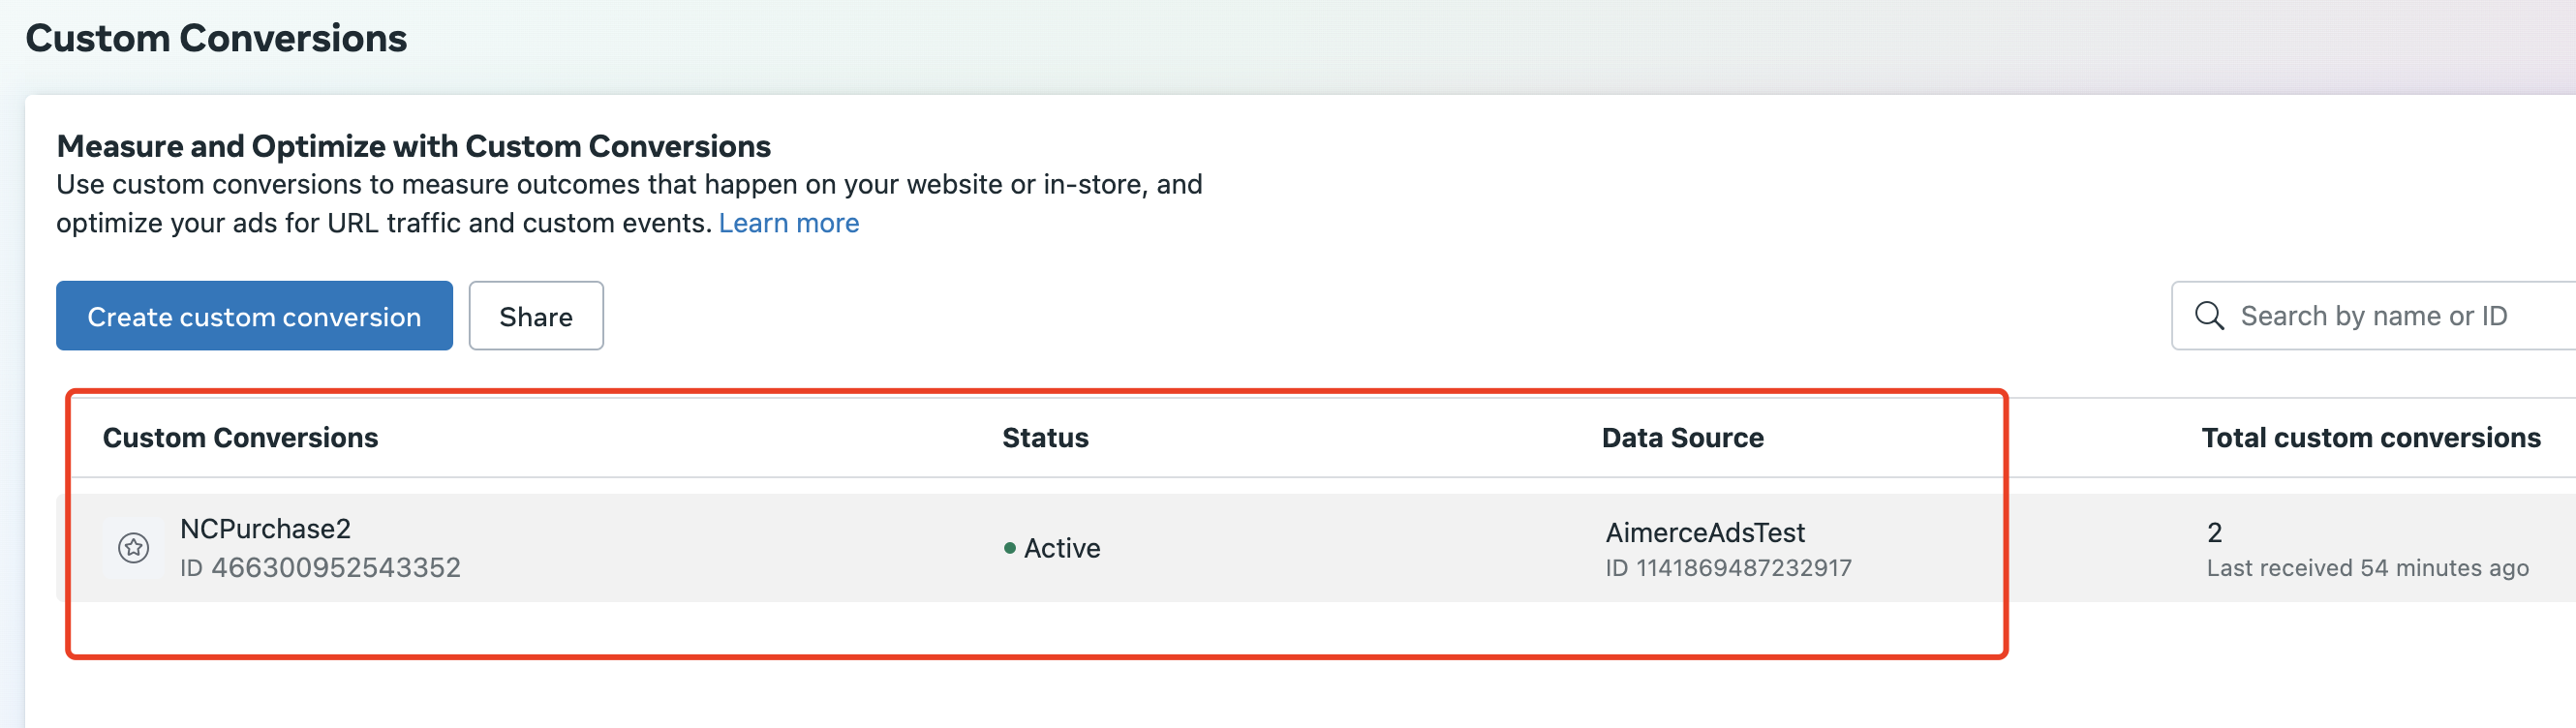
You will observe the previously created custom conversion listed in the table.
Expand the custom conversion that was created earlier and then click the "Share" button.

Click the section “Share with an Ad Account” in the dialog
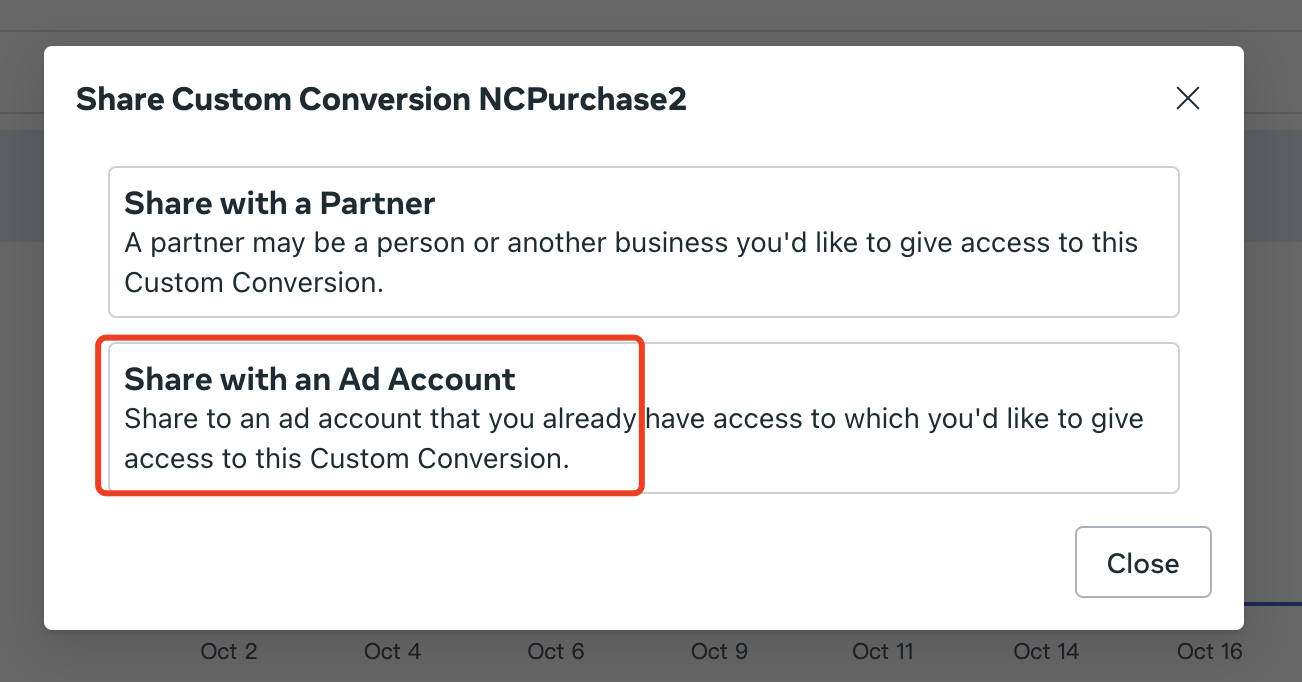
Select the account with which you wish to share, and then click on the "Assign New Ad Accounts" section to proceed.

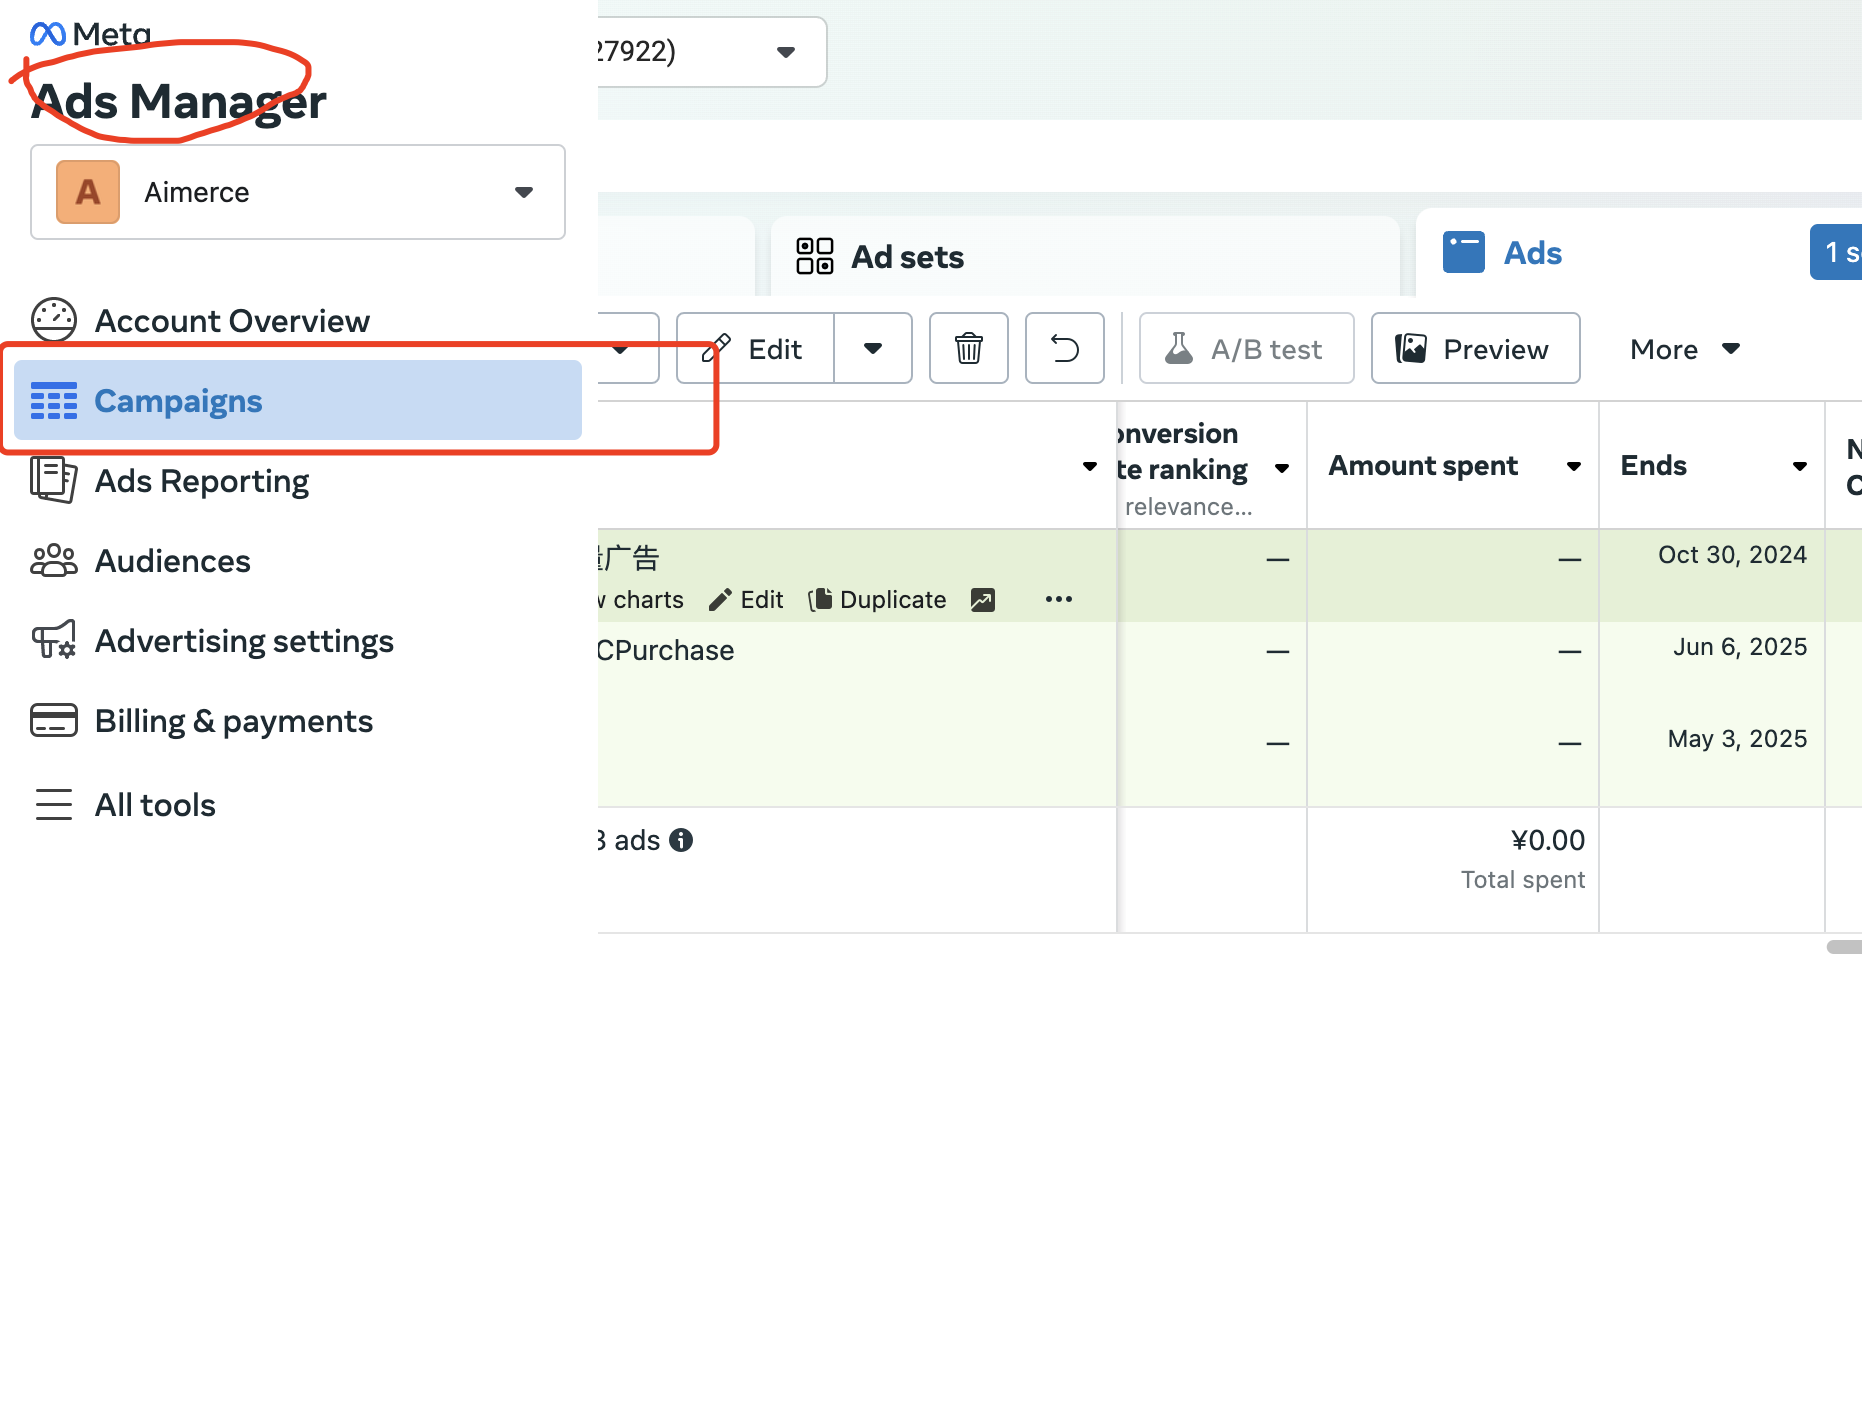
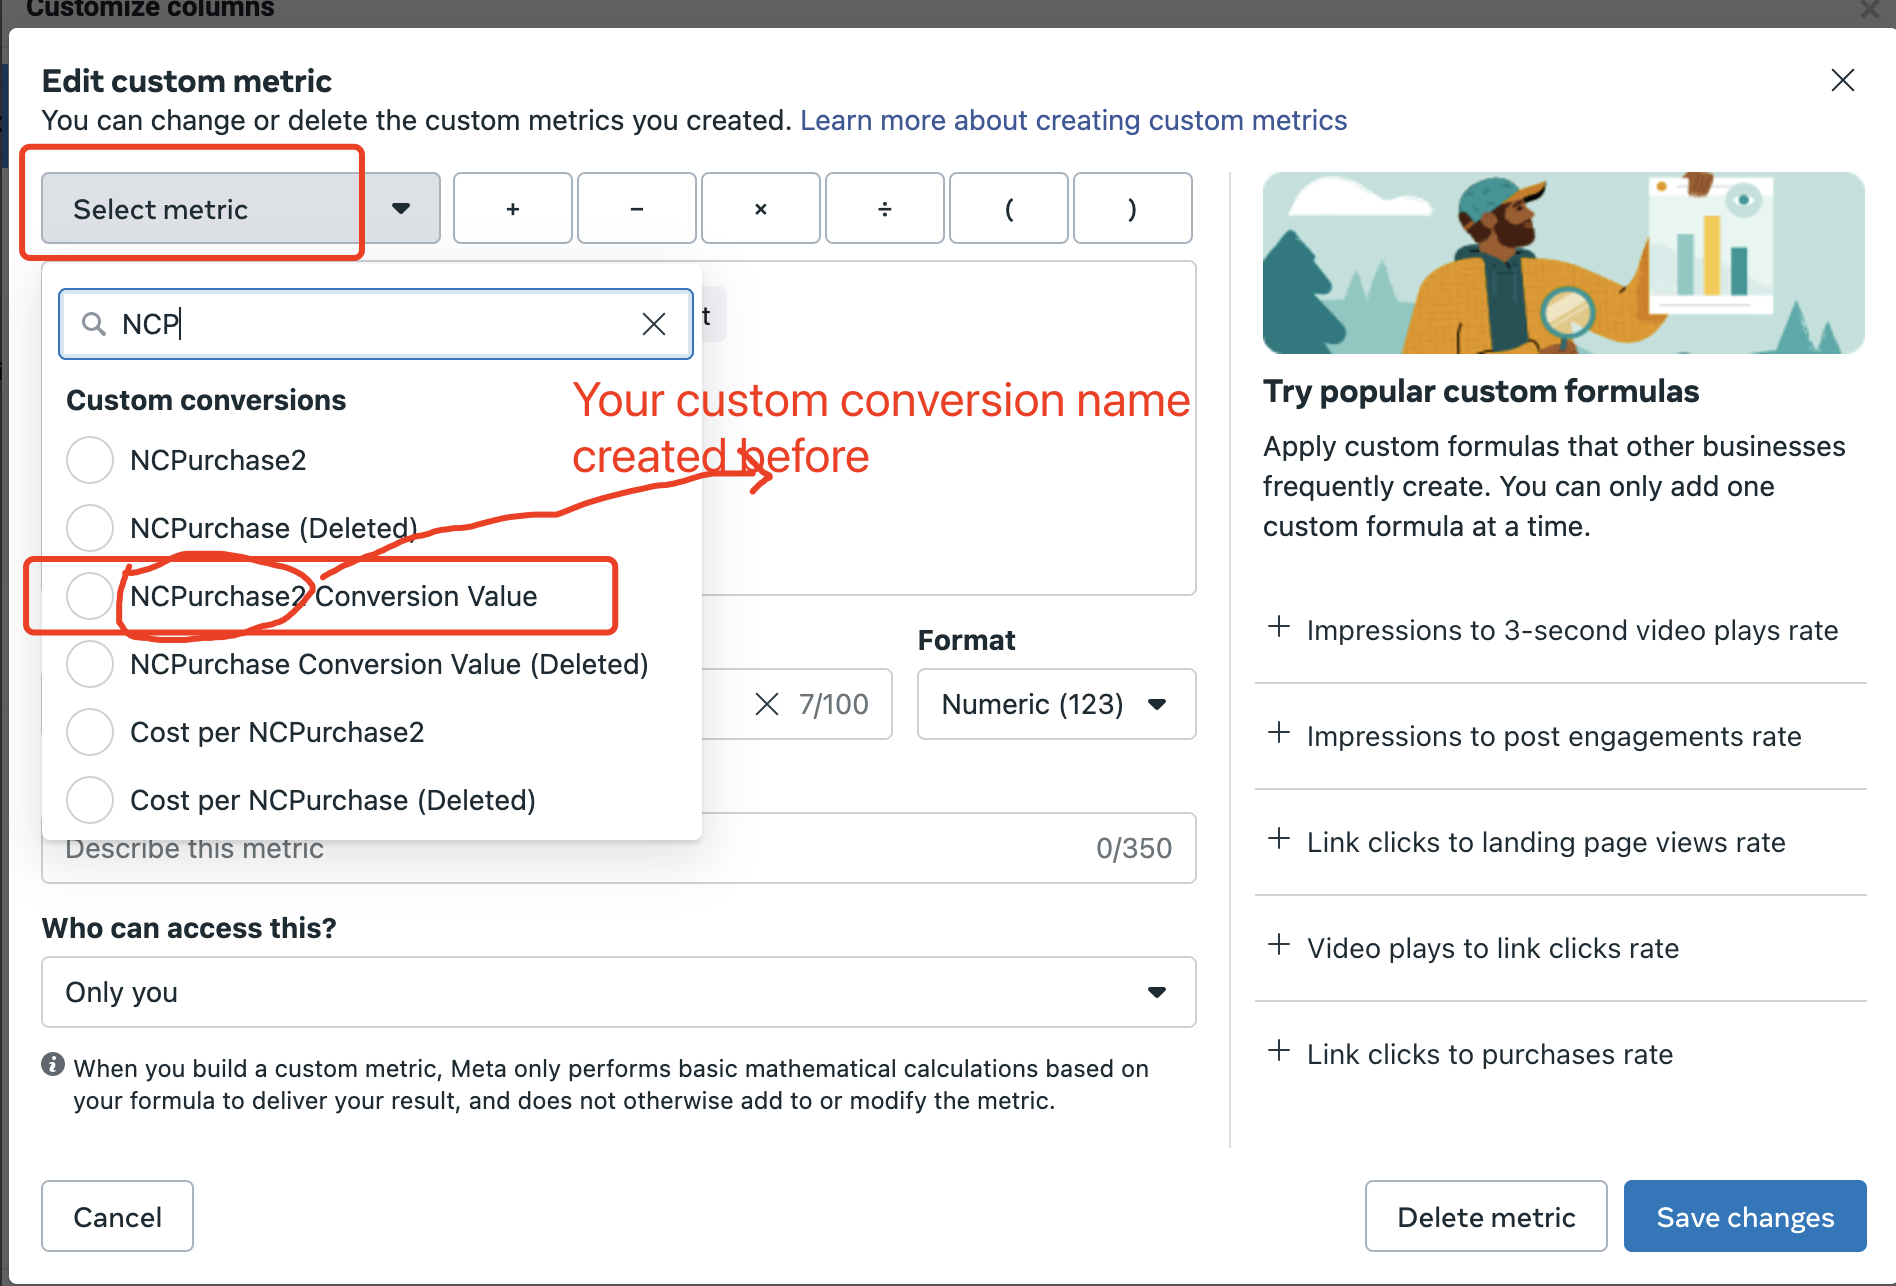
3. Create NCPurchase ROAS Metric
Proceed to the “Ads Manager” dashboard, and from the left side menu, navigate to “Campaigns.”
In the table's toolbar, click the dropdown menu labeled start with “Columns,” and then select “Customize Columns.”
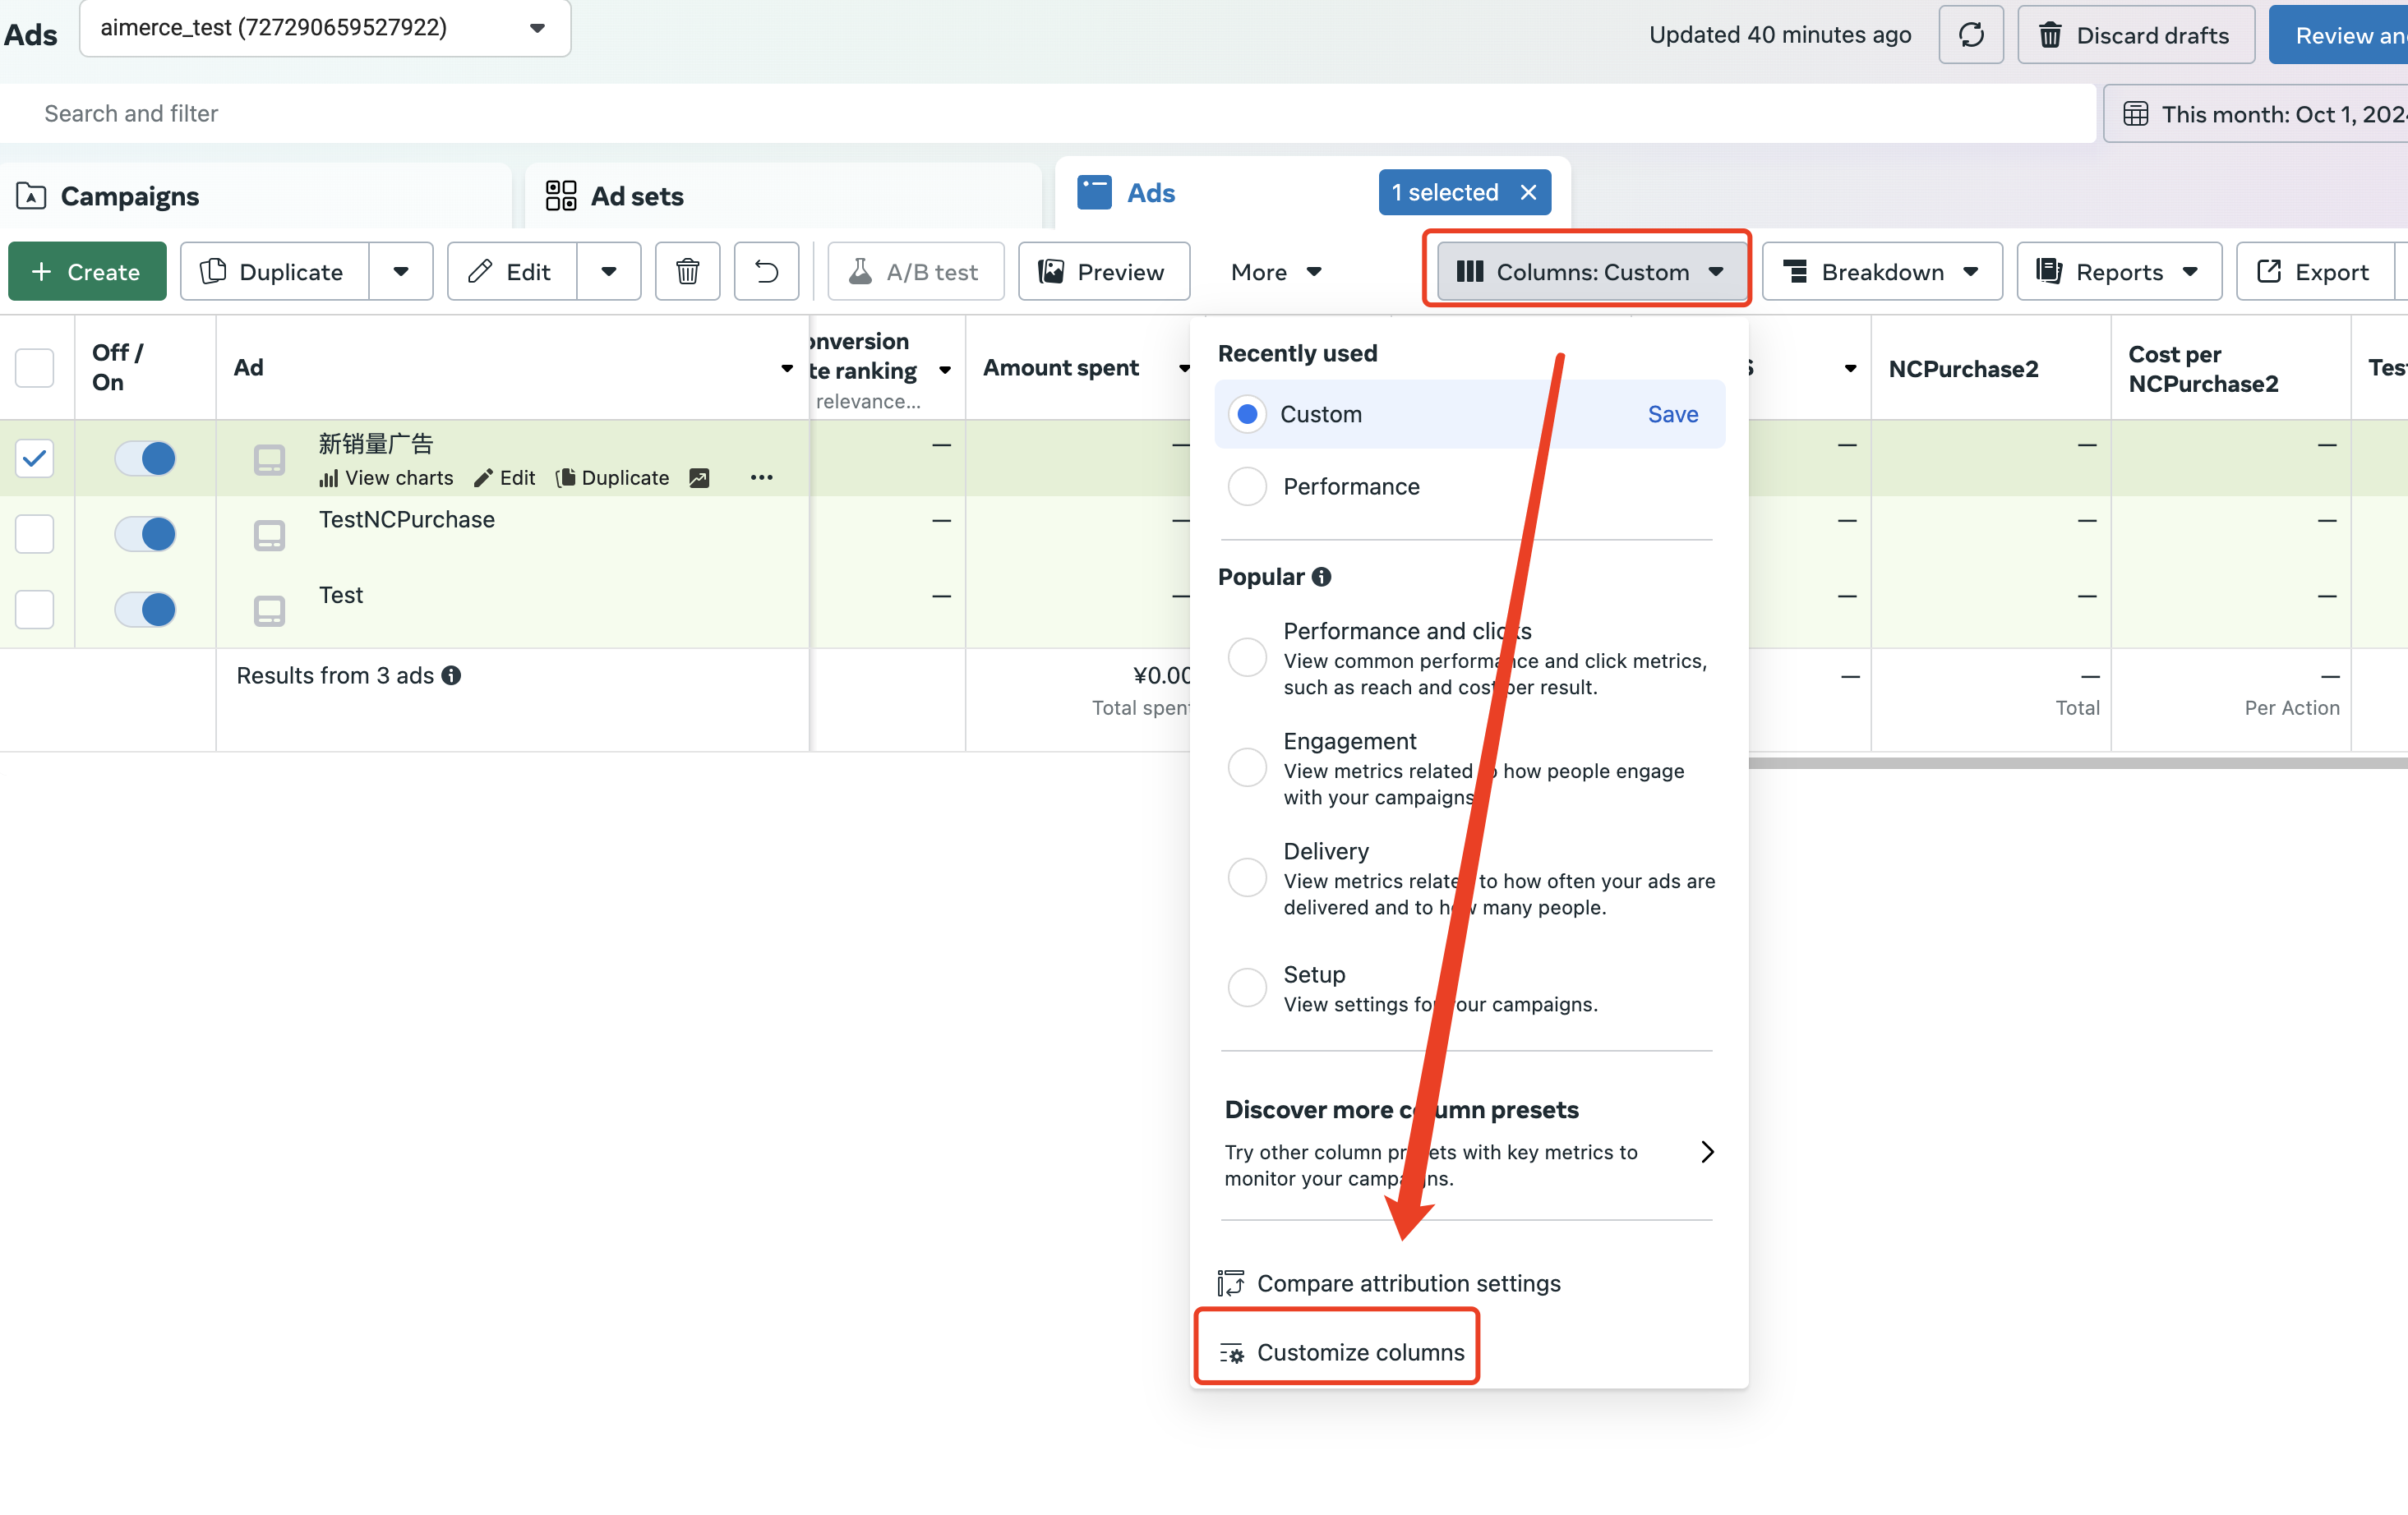
Click text button “Create custom metric”
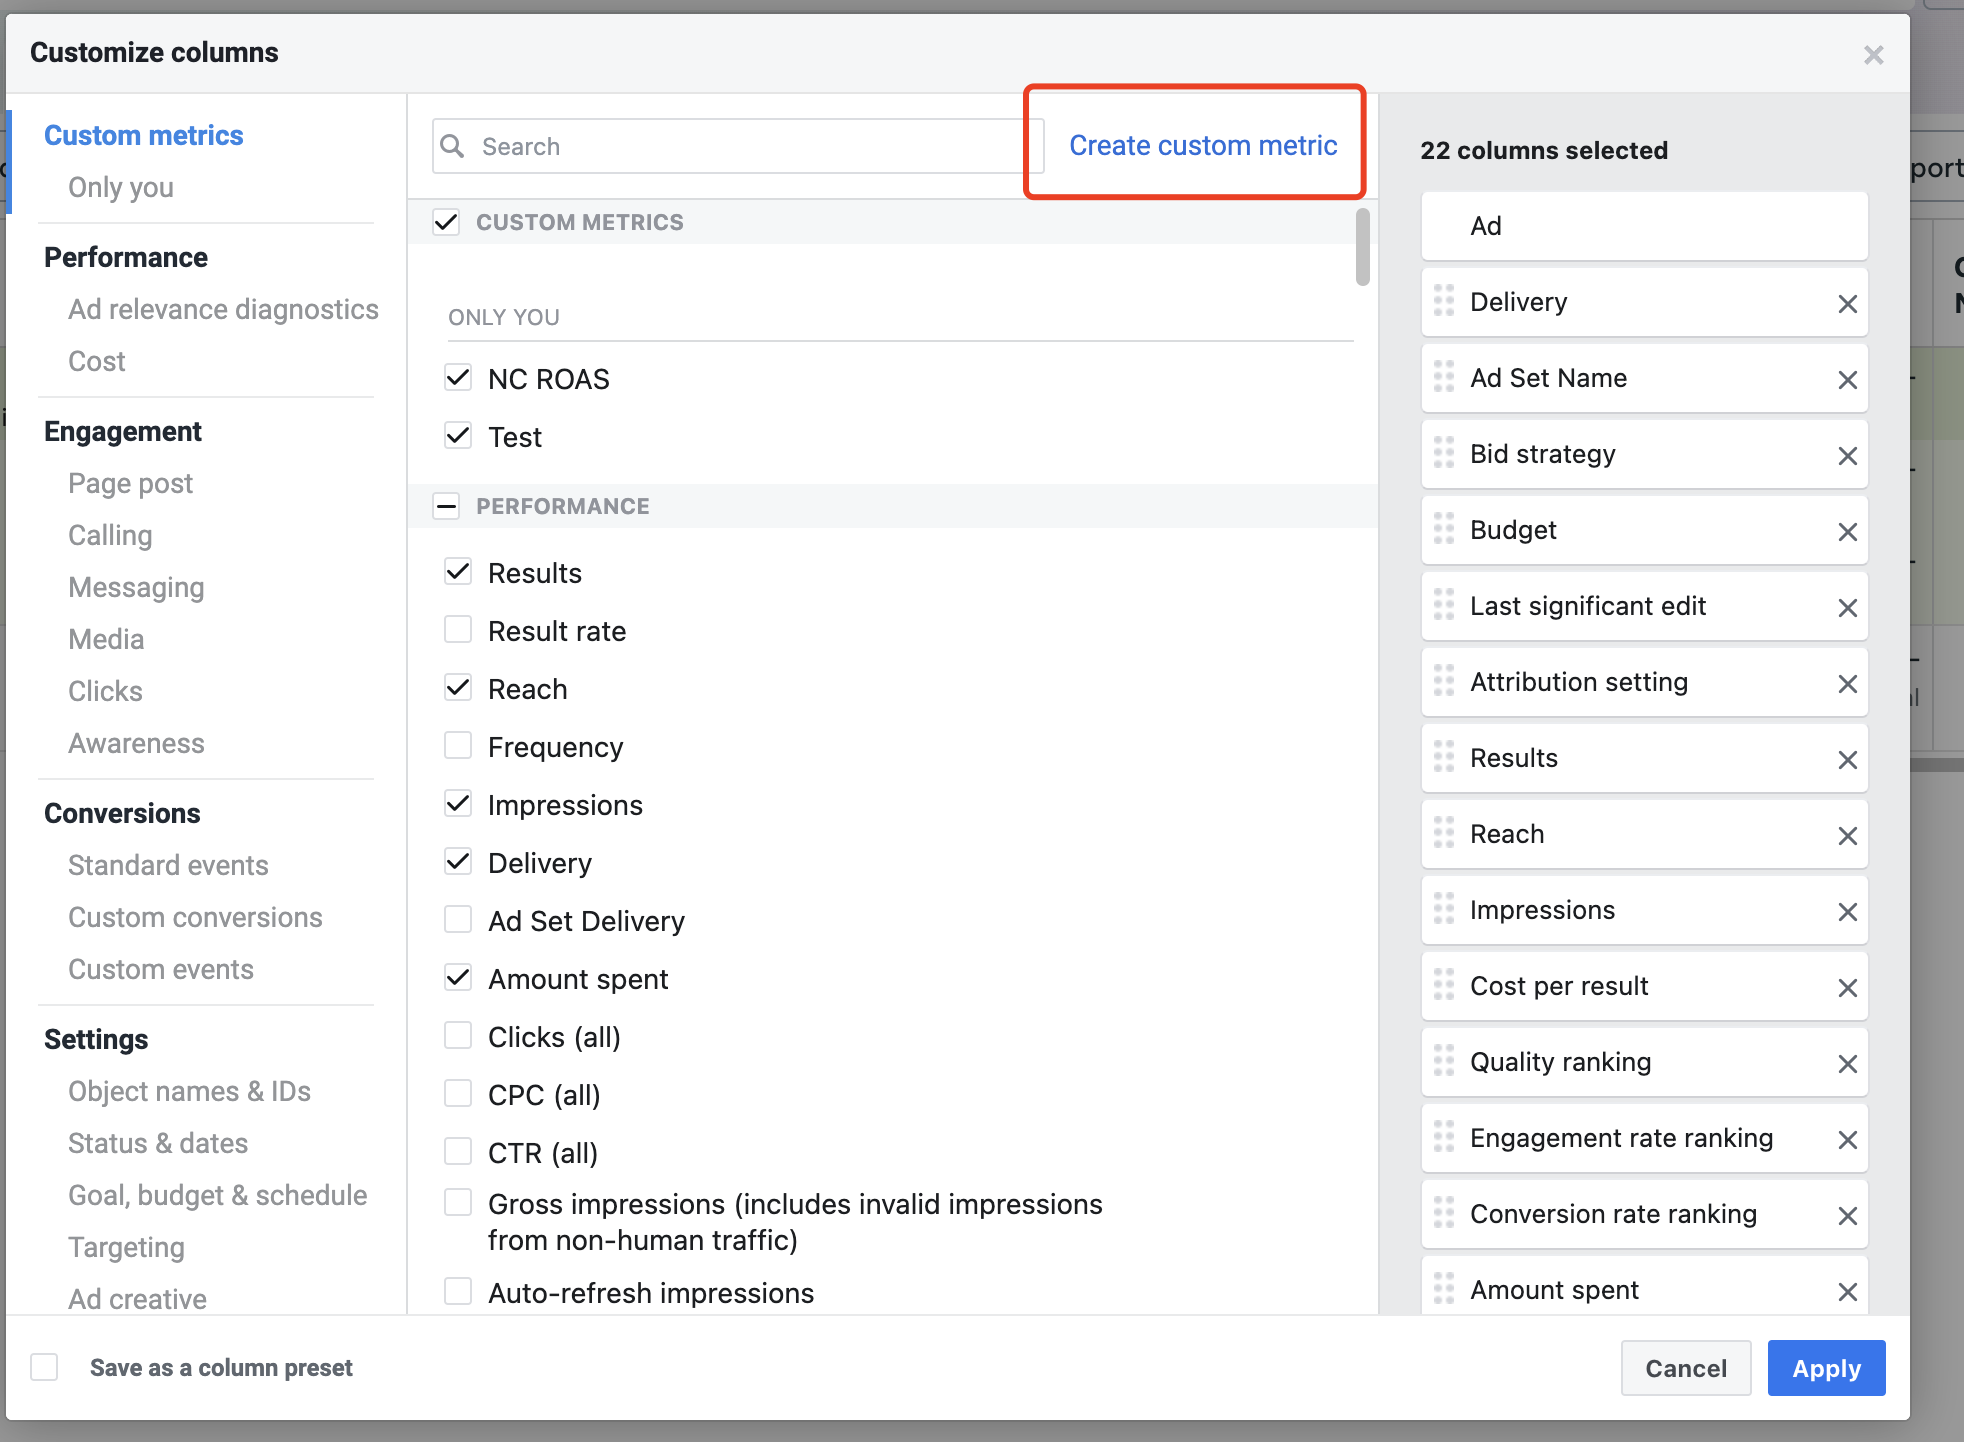
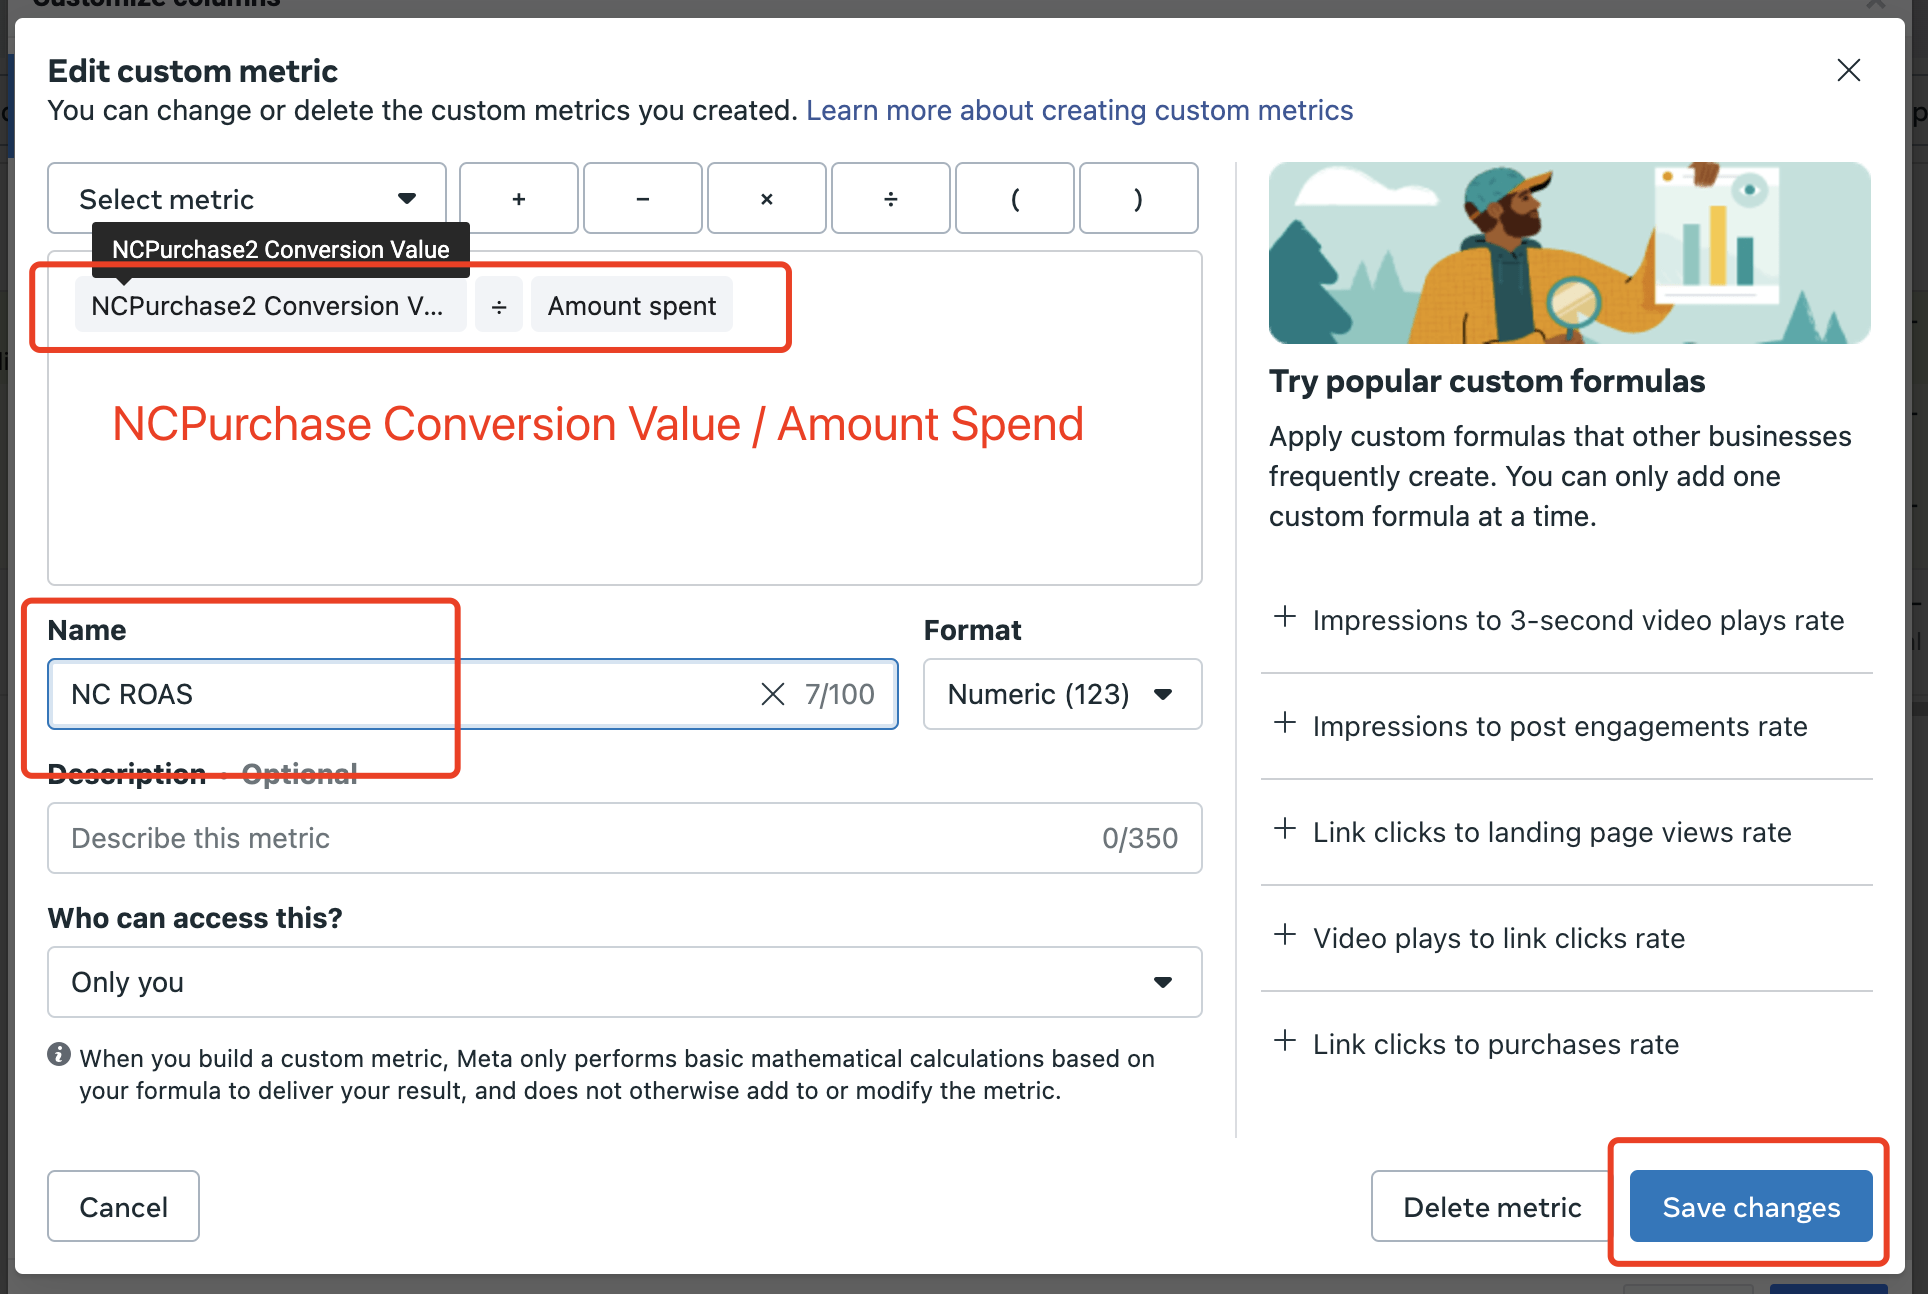
In this dialog, click the dropdown labeled “Select Metric,” then filter by “NCPurchase,” and select “NCPurchase Conversion Value.” Naturally, if the conversion created previously bears a different name, you must choose according to the name you designated.
Next, click the division sign, and then select another metric by clicking “Select Metric,” where the metric is “Amount Spent.” This will yield a formula as illustrated in the following image. And click “Save changes”.
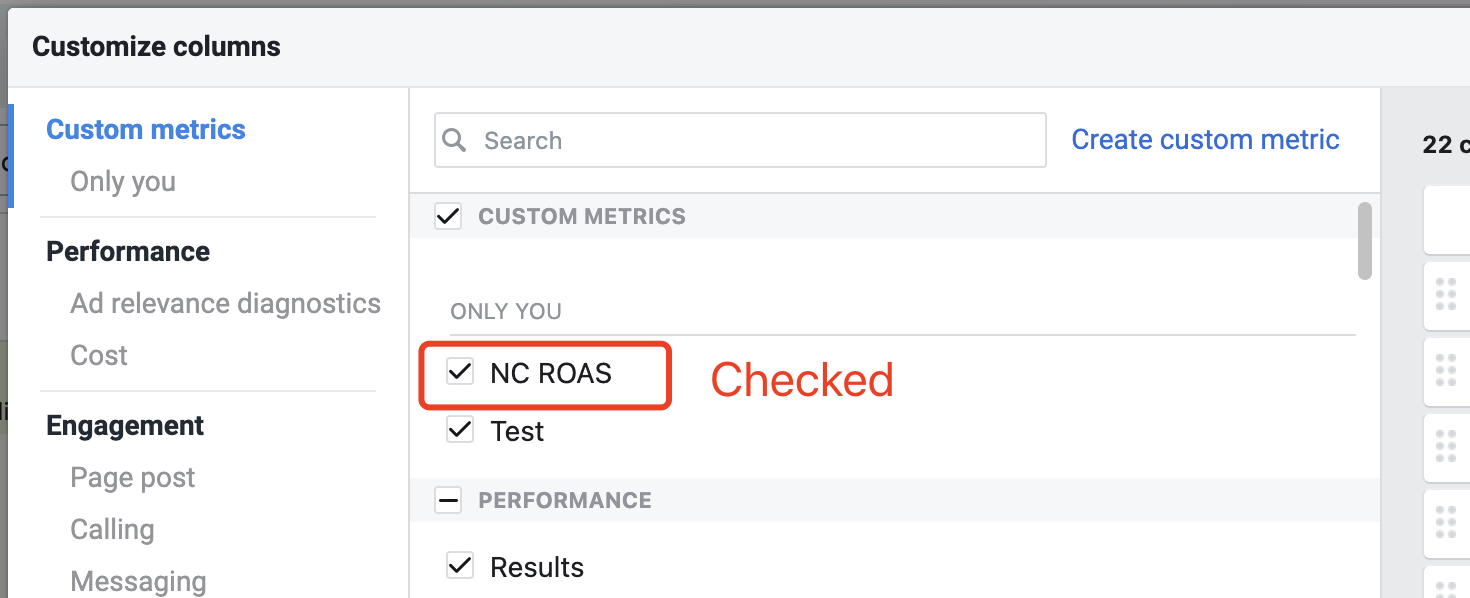
Thus, you will see the metric within the category of “Custom Metrics” and subsequently check it.
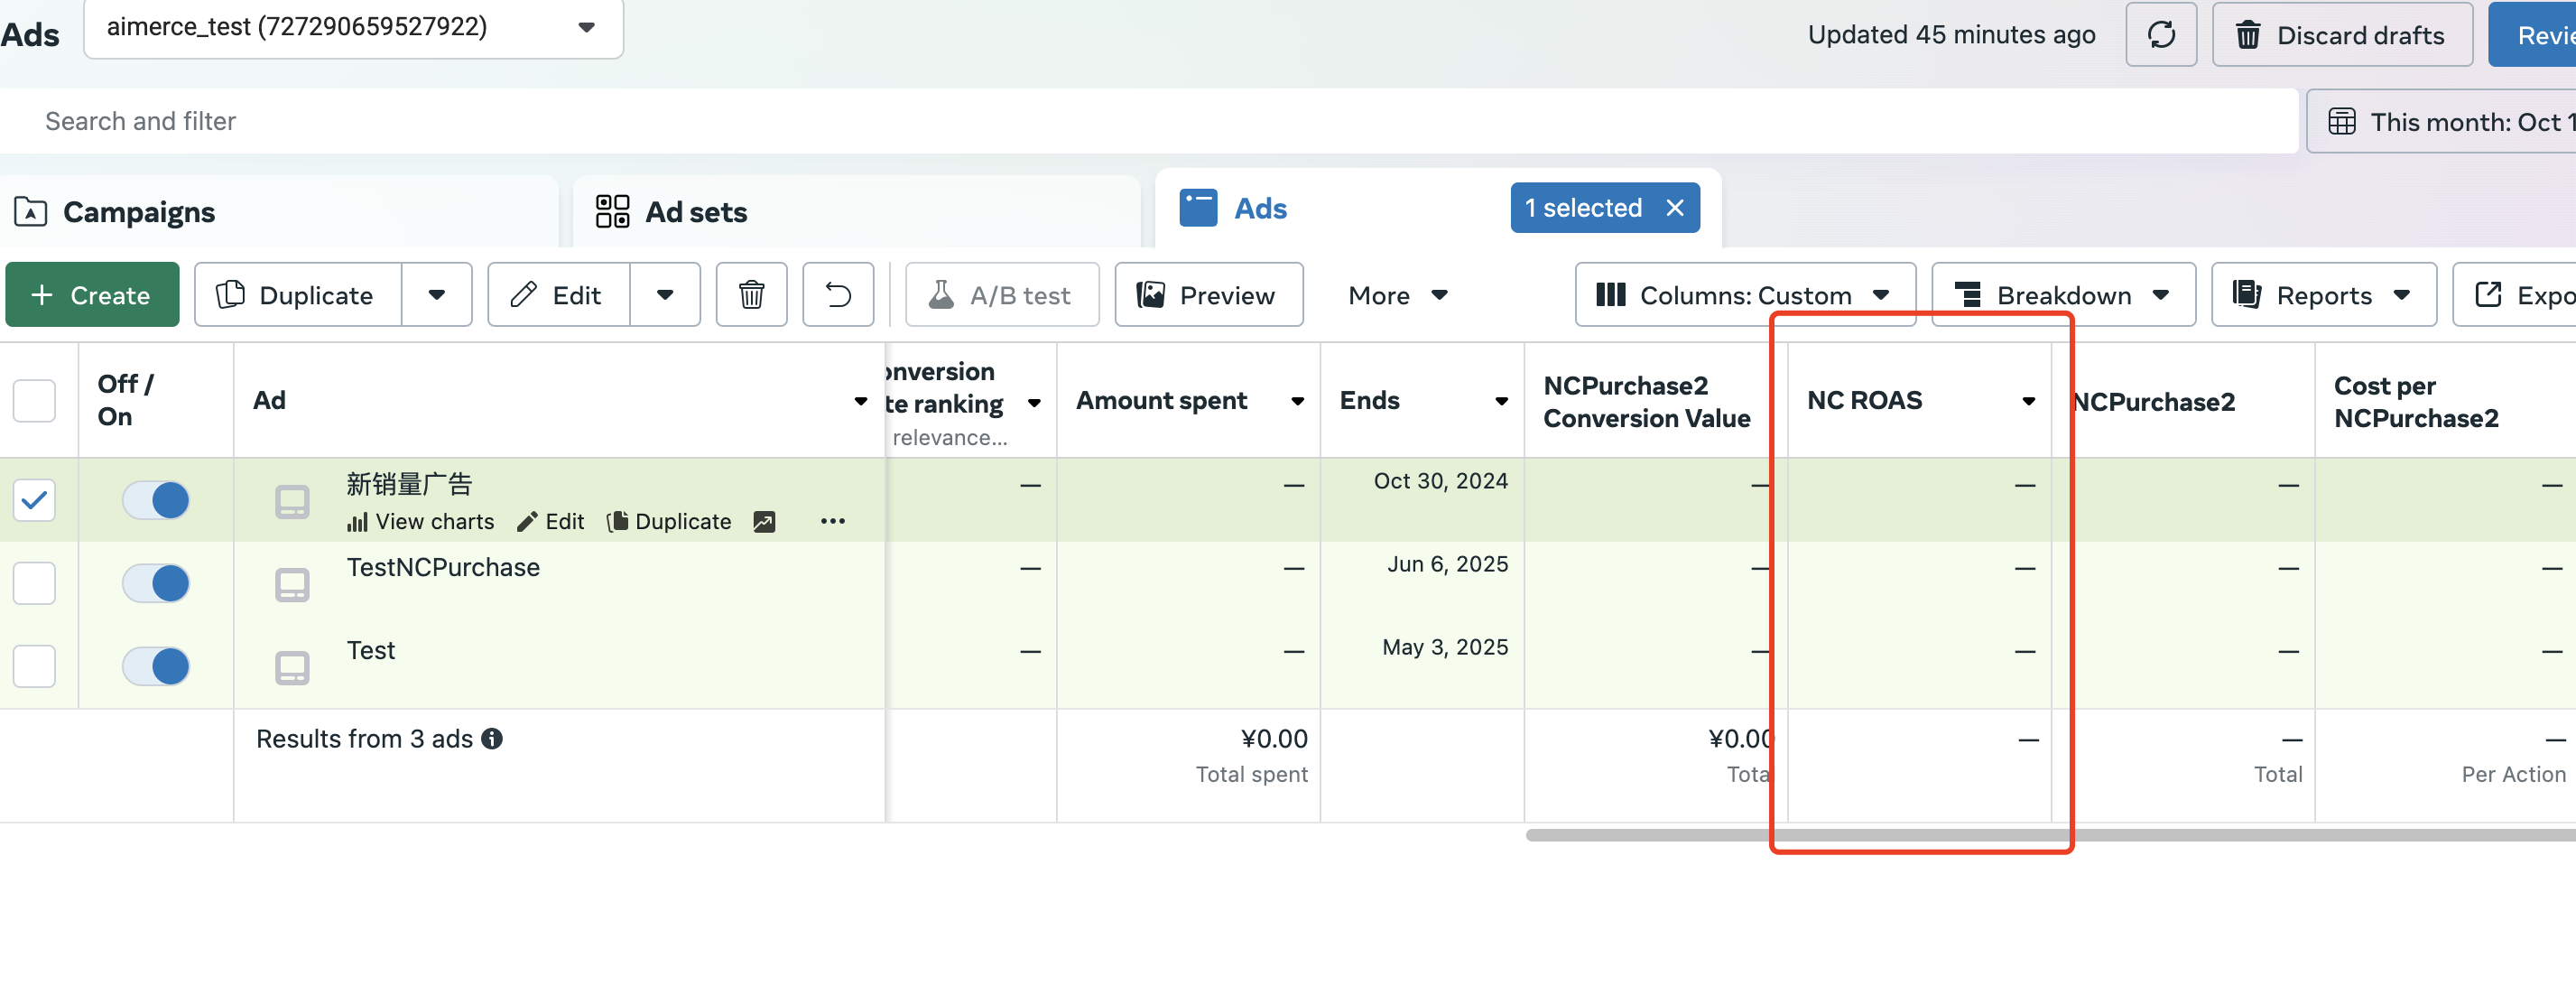
Finally, you can see the column labeled “NC ROAS” within the table.
Create custom conversion of RCPurchase
You can create a custom conversion for RCPurchase by referring to the NCPurchase created earlier.
More metrics
If you want to create other metrics, adjust the formula and format in the creation dialog.
Here are some common metrics:
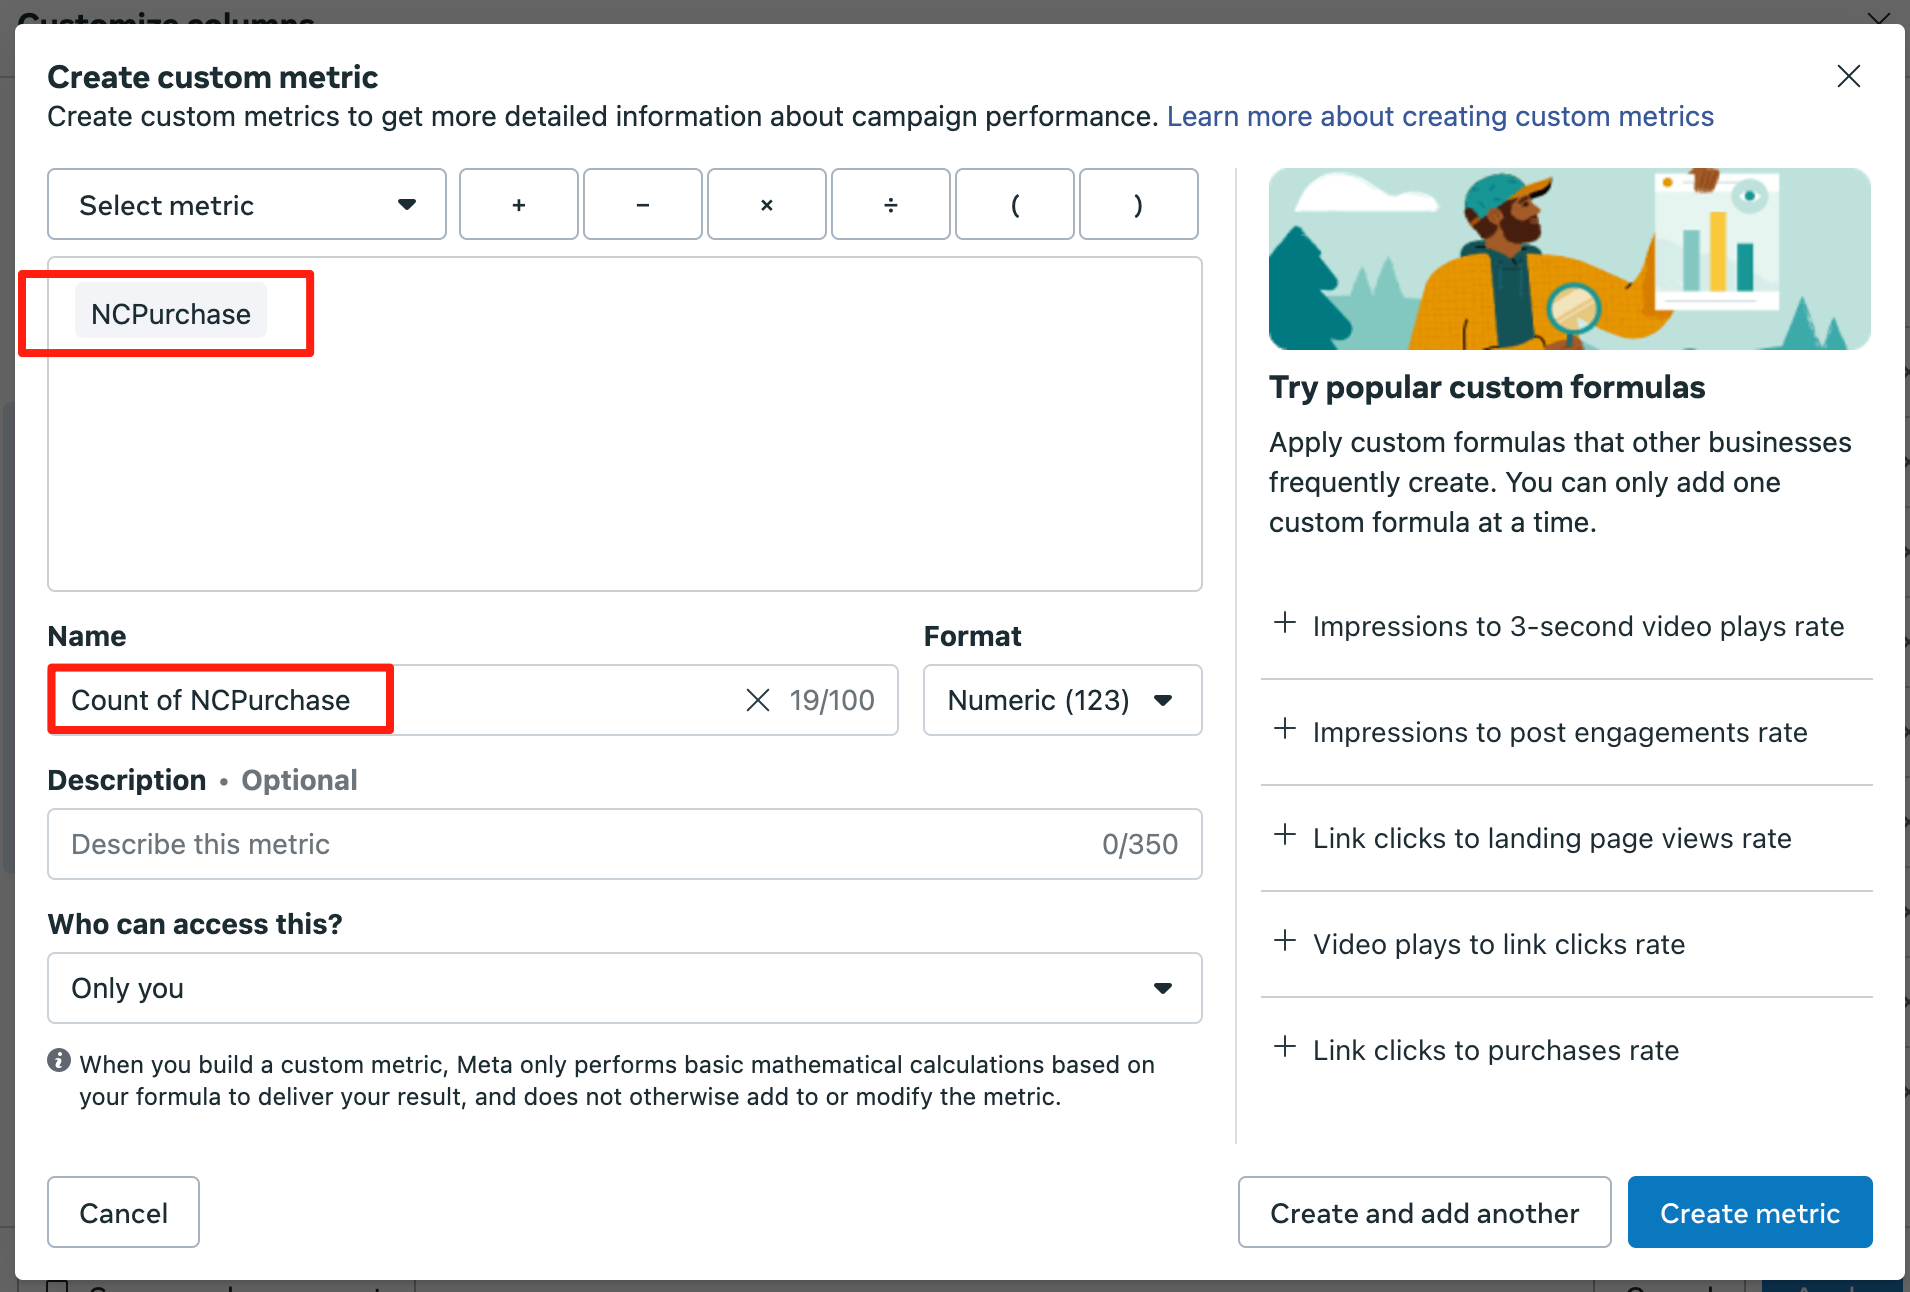
Count of NCPurchase
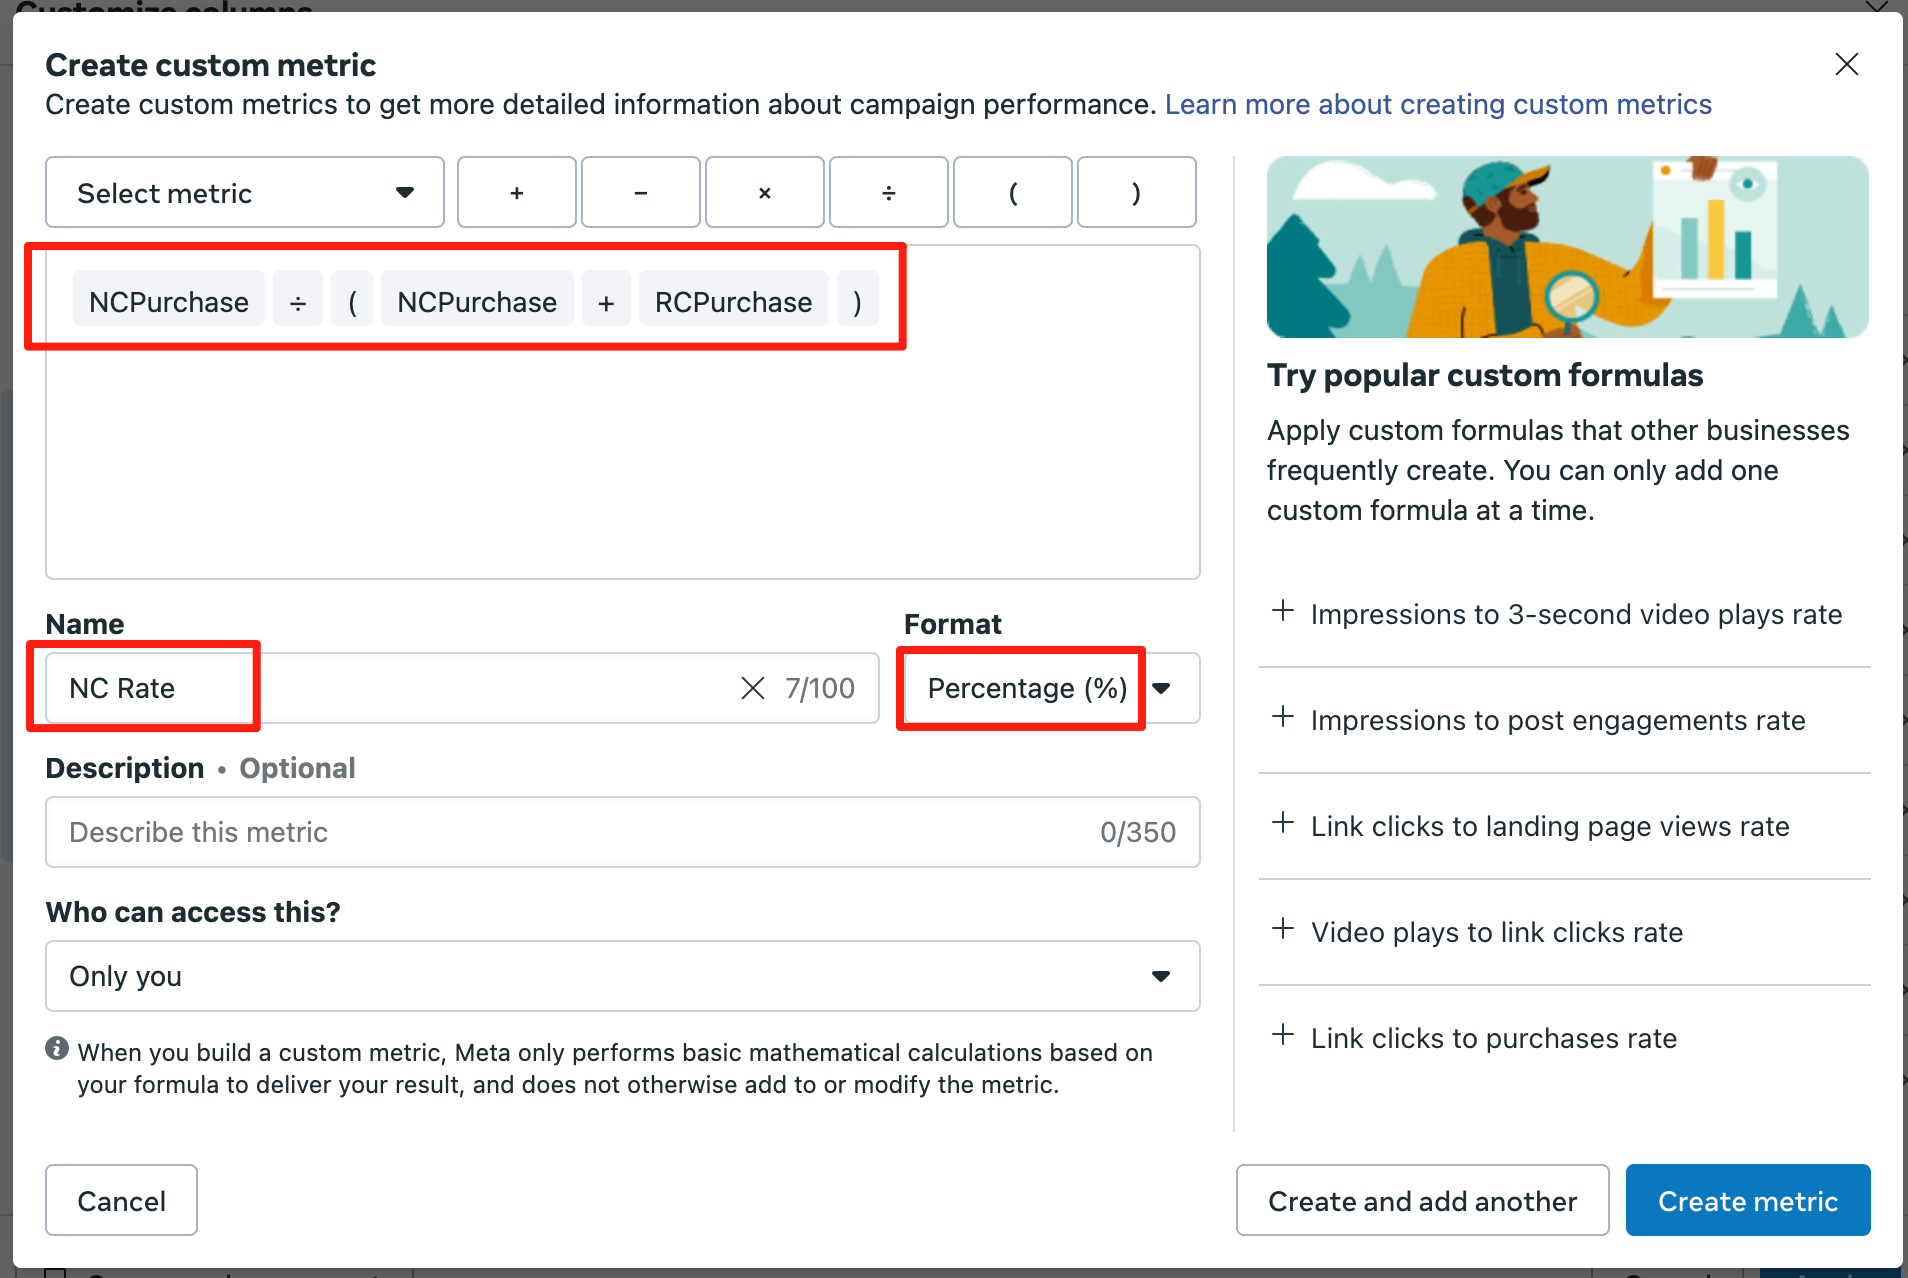
NC Rate
Note: set Format as Percentage
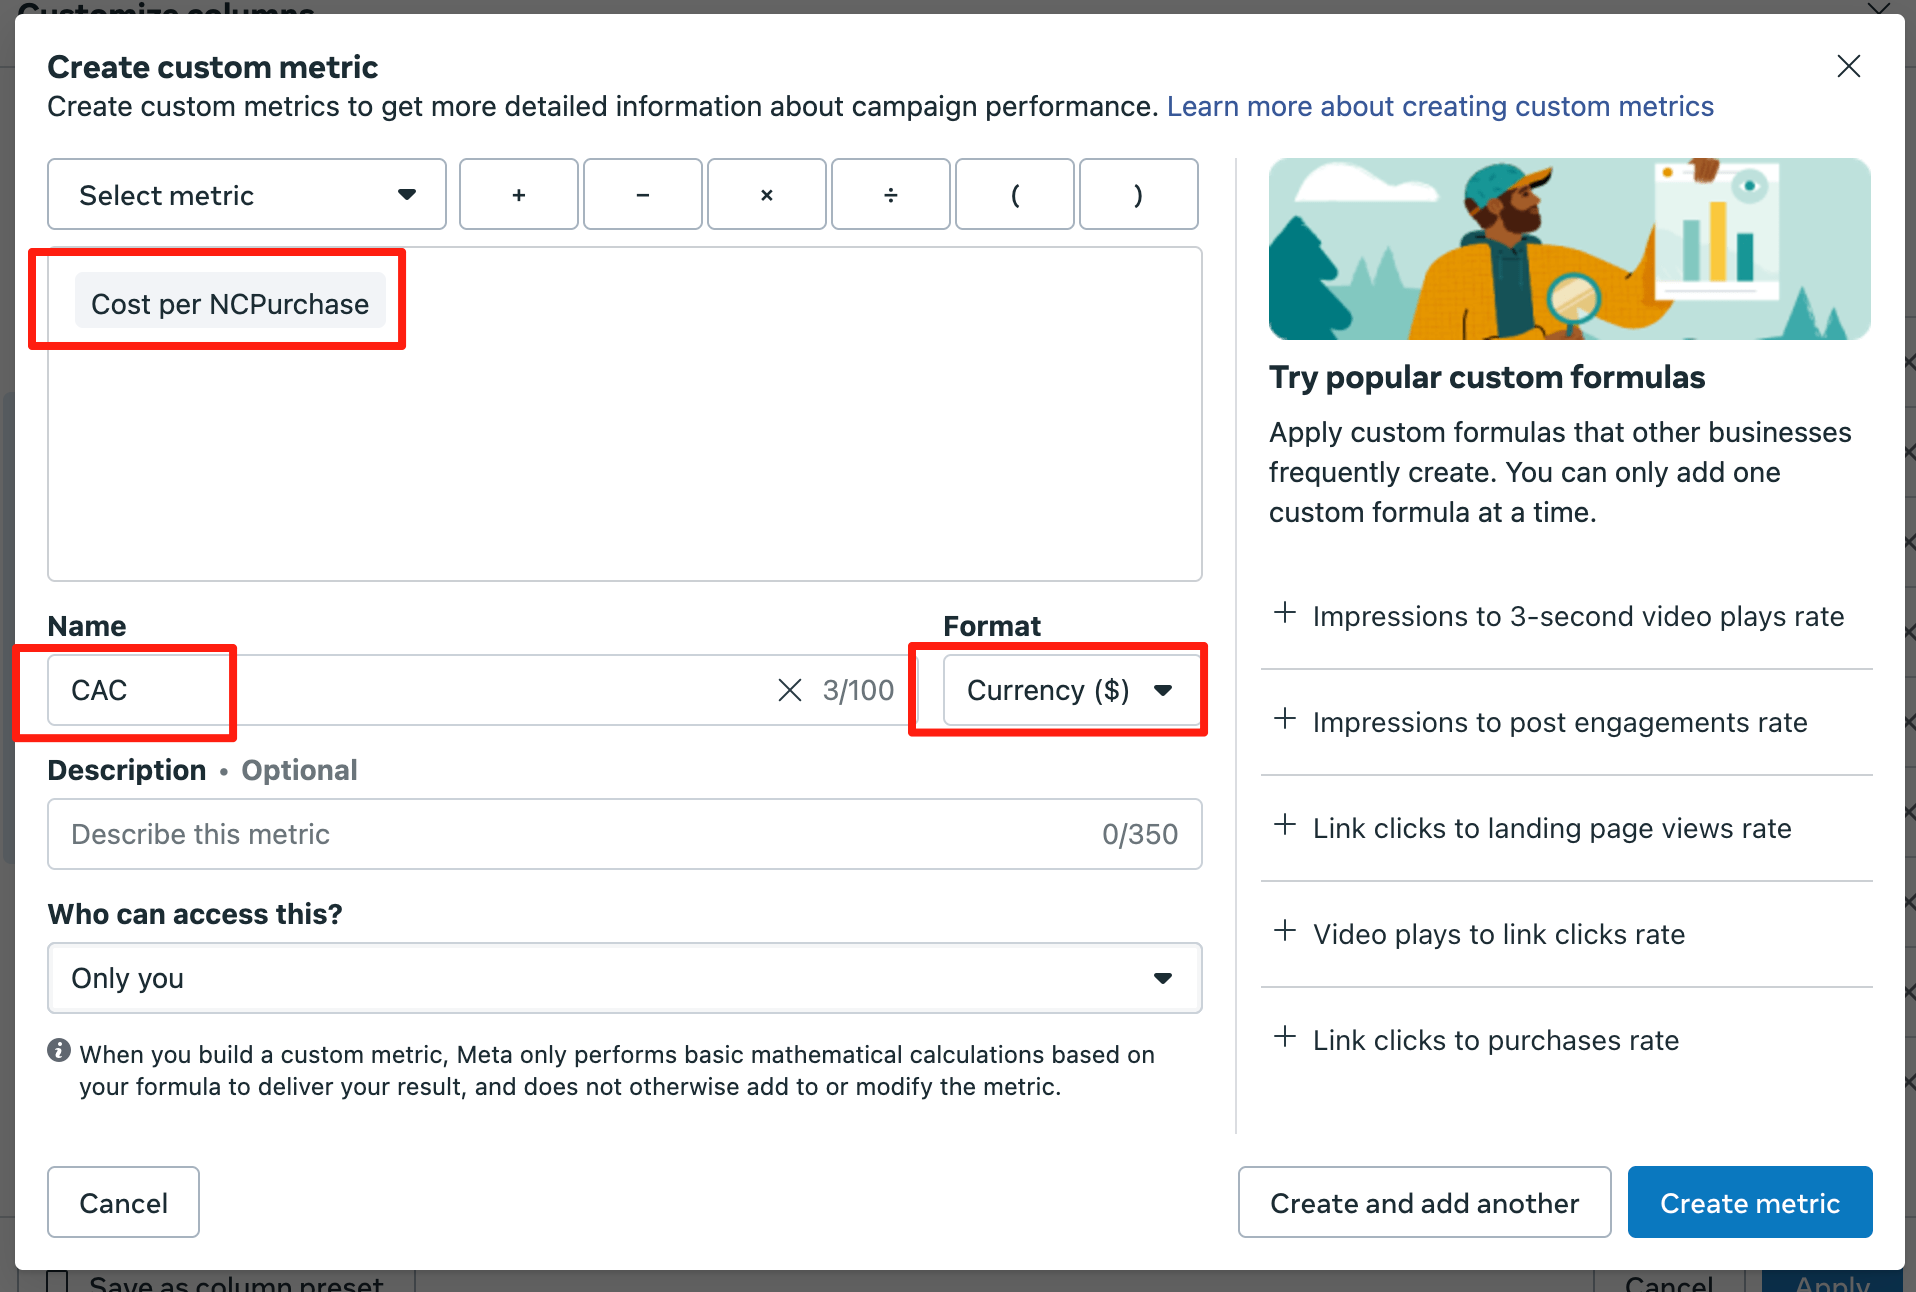
NC CAC
Note: set Format as Currency